If it’s not obvious by now, I quite like walking up Tasmanian mountains.
But I also love a good costal walk when the time is right!
Often the time is right when the weather forecast for the mountain areas is bad, and that is exactly how I found myself on the Freycinet Peninsula in early March.
I’d originally planned to try for Mount Ida, but it seemed the weather gods were not all that happy with me - so the east coast it would be.
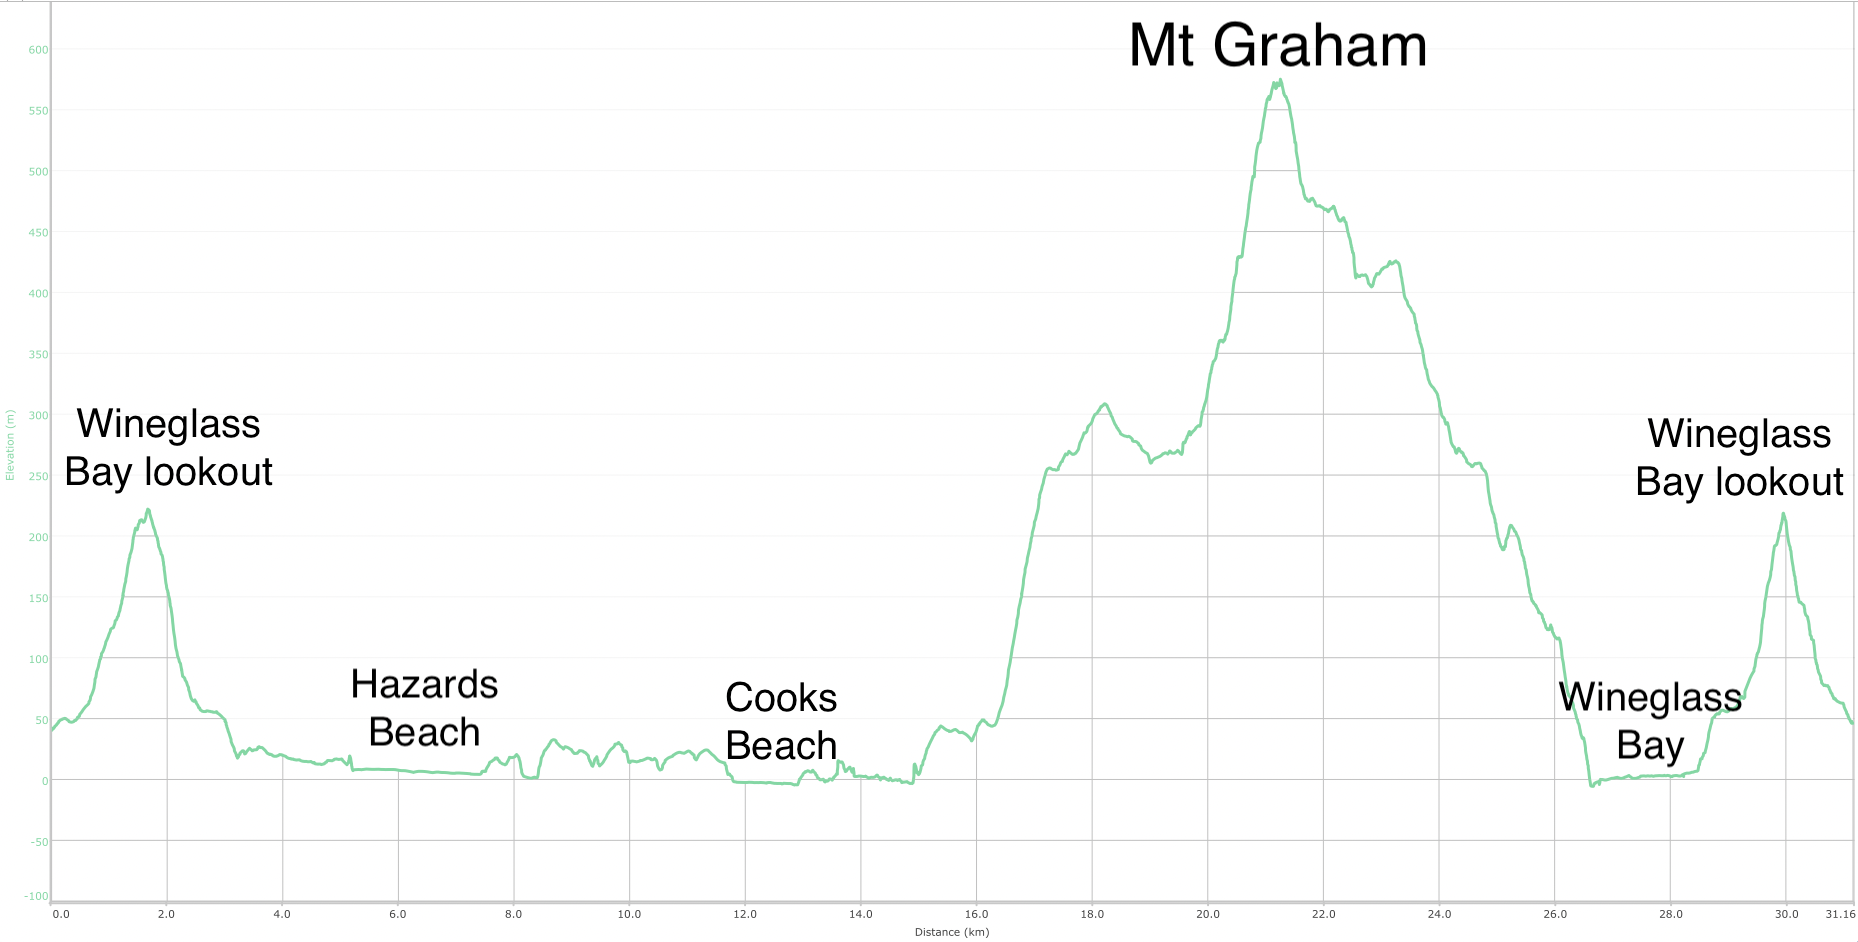
I had never actually done the Frecycinet Circuit before, and was looking forward to it. It’s obviously a very famous walk with some spectacular scenery - Wineglass Bay/Hazards/etc - so the plan was to stay one night at Cooks then return home via Mount Graham and Wineglass Bay.
Day 1: Carpark to Cooks Beach
We set off from the Wineglass Bay carpark around 2pm. There weren’t too many people around, luckily, and we quickly gained altitude walking up the very well trodden track to the Wineglass Bay lookout.
It’s very easy going along the very well graded track, and I thought to myself that Parks and Wildlife has done a very good job with this walk.
After not too long, we came to the saddle and all the signs were pointed to the lookout.
Who am I to say no to that?
It’d changed a bit since I was last here - there’s now more human traffic control systems in place like one way flow, presumably to keep things moving a bit when this place gets really busy.
We were lucky that there weren’t too many people around, we got the classic shot and shuffled on.
Once we made it back to the saddle, it was time to head down again. Down the 1000 steps, the sign said.
Down and down we went. After a while we came across a couple who were coming the other way (so heading up the hill) and didn’t look too happy about it.
“How long to go,” one of them asked.
“Ages!” I replied. In reply, I received a groan and an even less impressed facial expression.
Can’t help you there sorry!
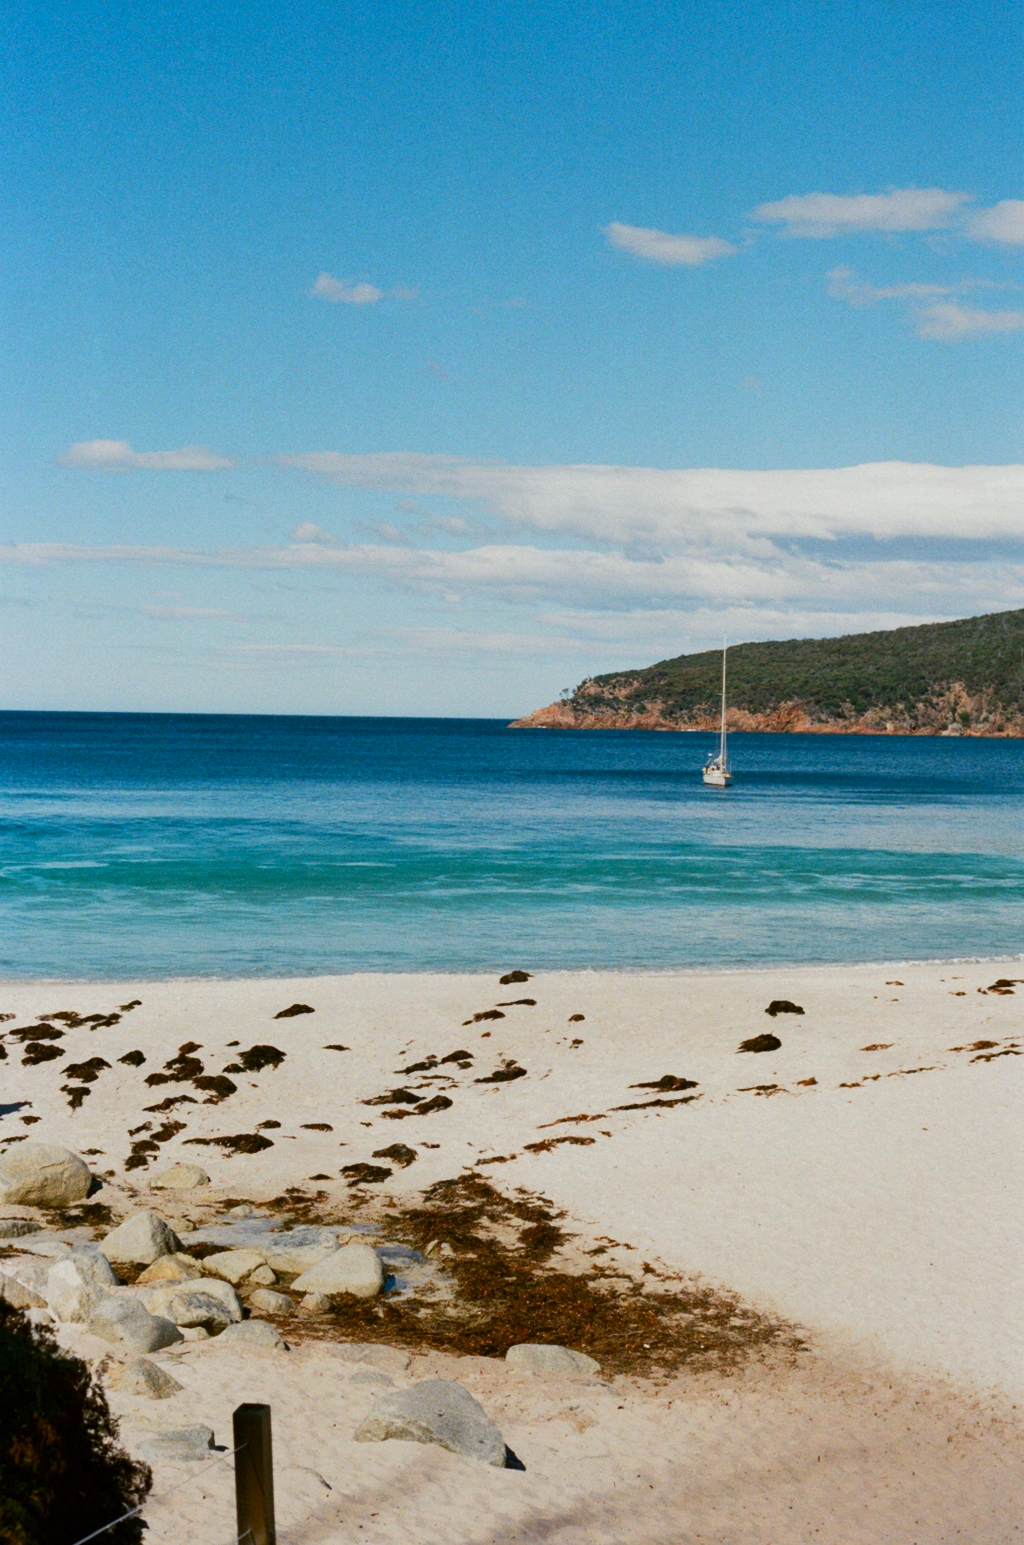
Soon we were at Wineglass Bay, and it’s just such an amazing view really isn’t it.
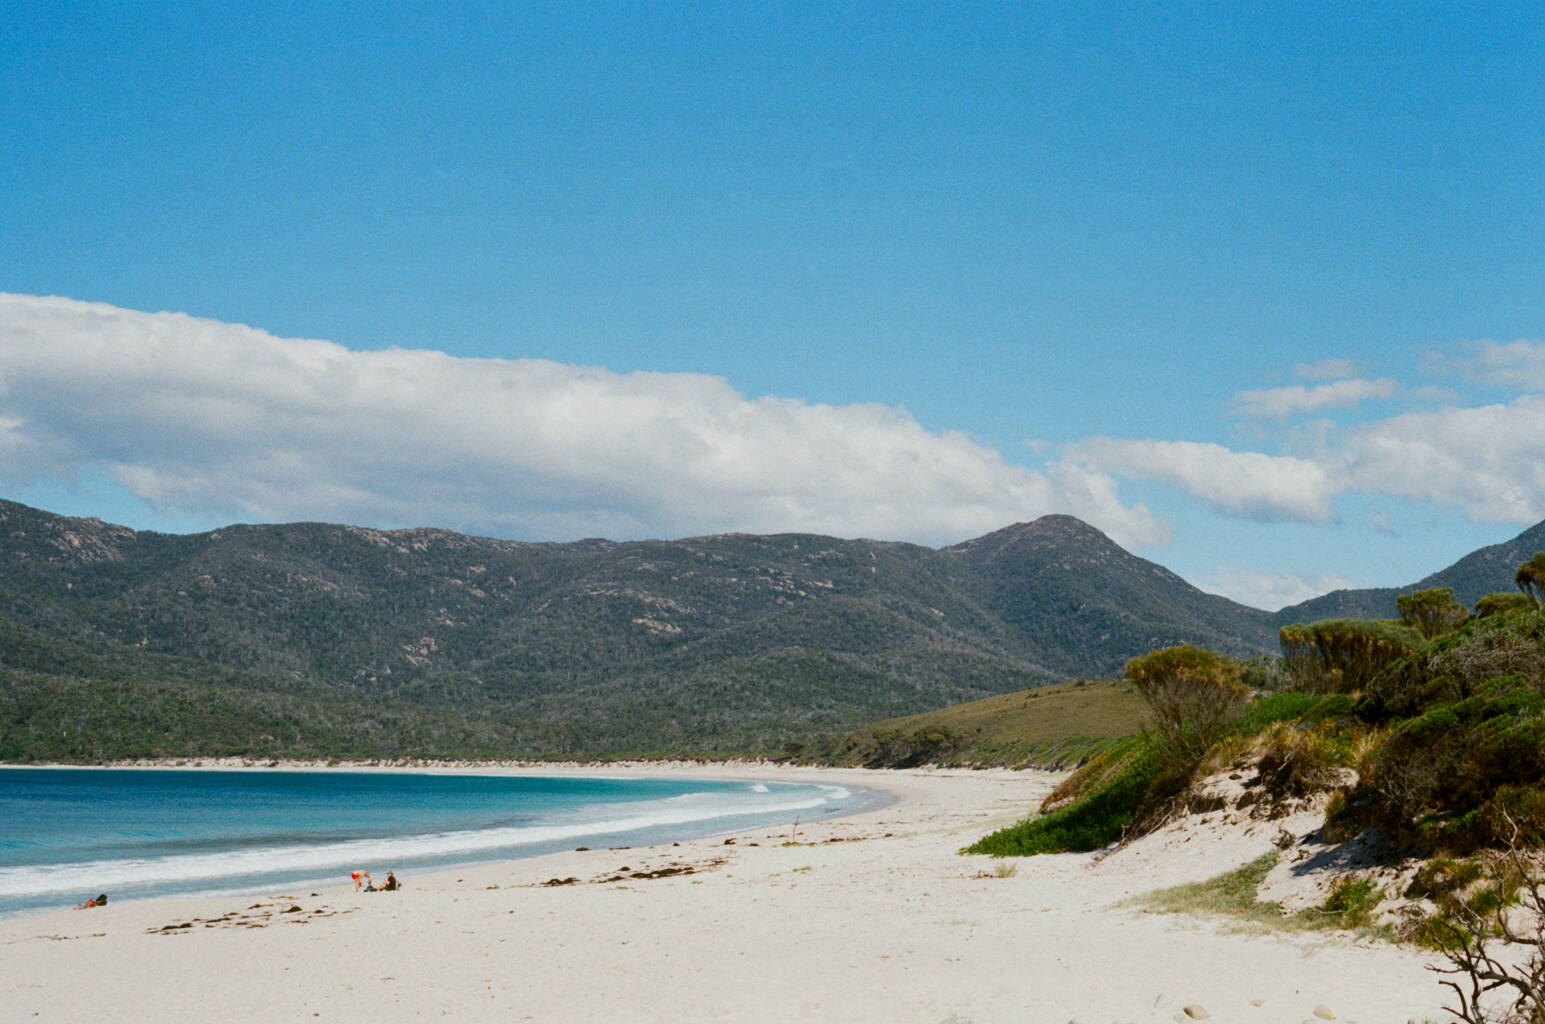
Amazingly coloured water, beautiful looking sand and wallabies hopping about.
A yacht or two anchored not too far out, people swimming and sun baking the afternoon away.
But time was ticking, and we’d be back here tomorrow so we pushed on.
We wandered down the Isthmus Track and eventually popped out at Hazards Beach.
The wind was blowing much more this side, but thankfully it was coming from behind us so with a massive wind assist were were at the end of Hazards Beach pretty quickly.
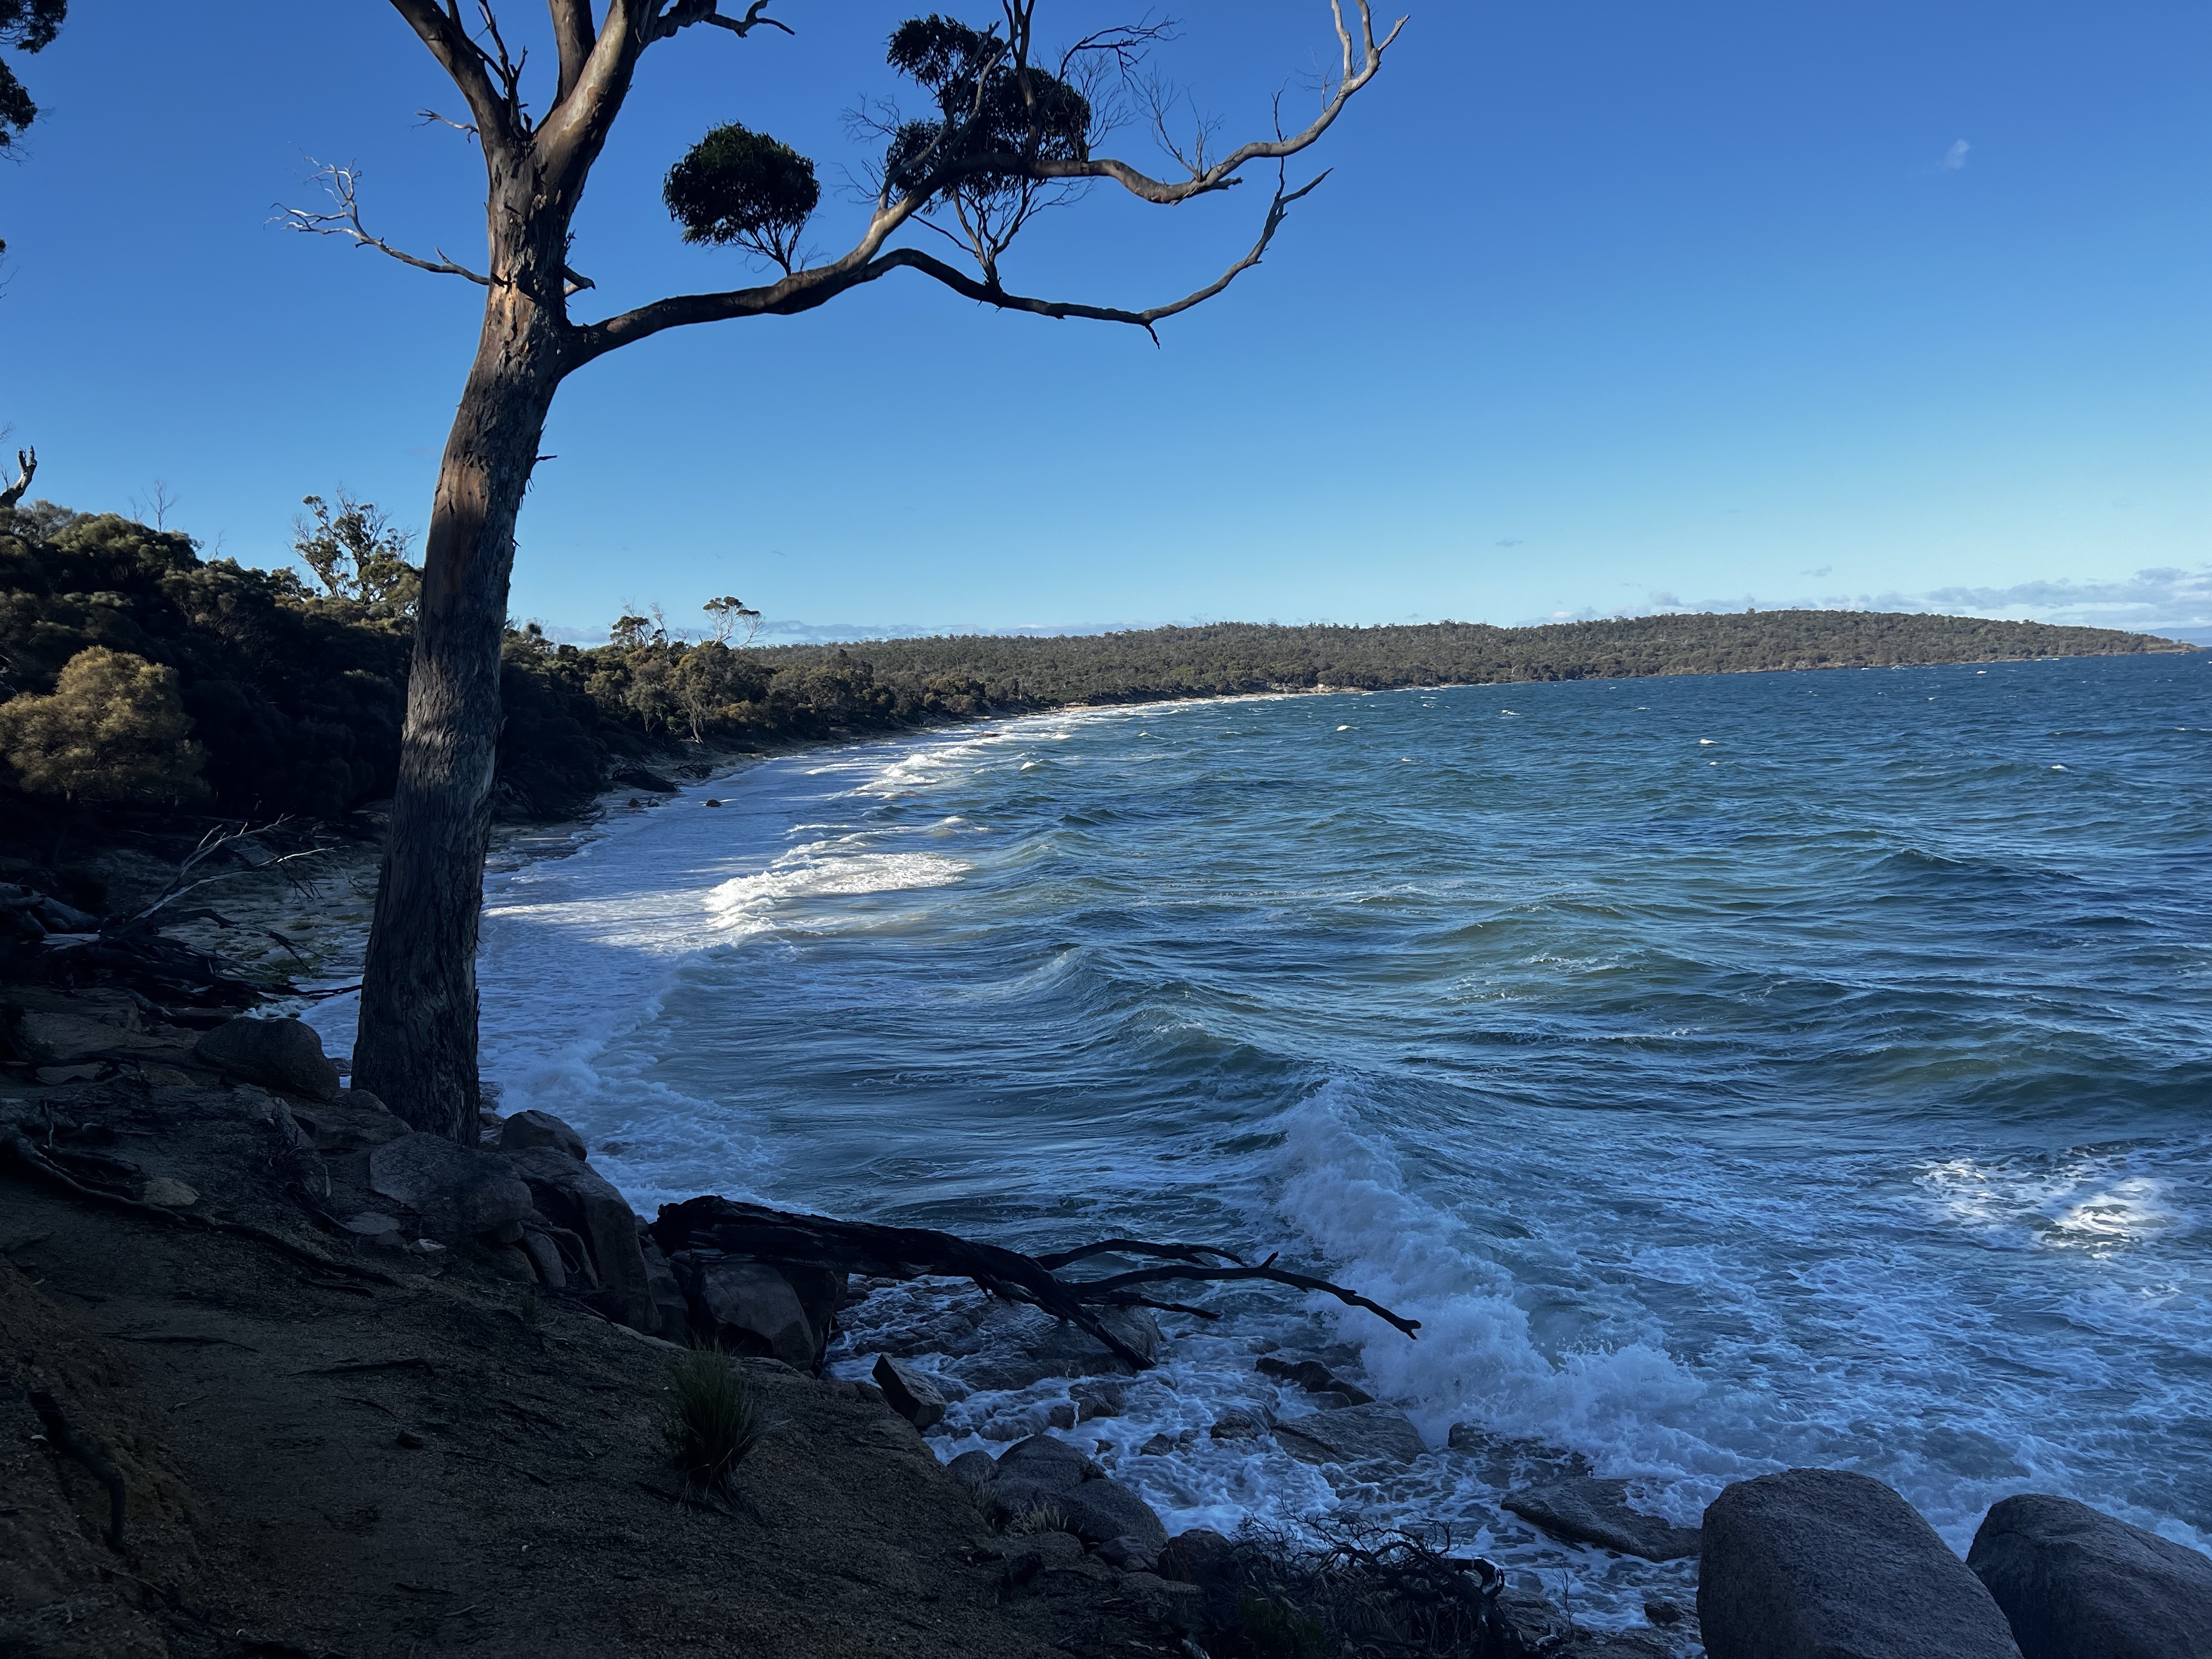
From there, it was back into the bush and over the headland a bit - headed to Cooks Beach.
I can report we got a bit lost along the way, due to a small mishap with some coloured tape taking us to a little shack thing rather than the track itself.
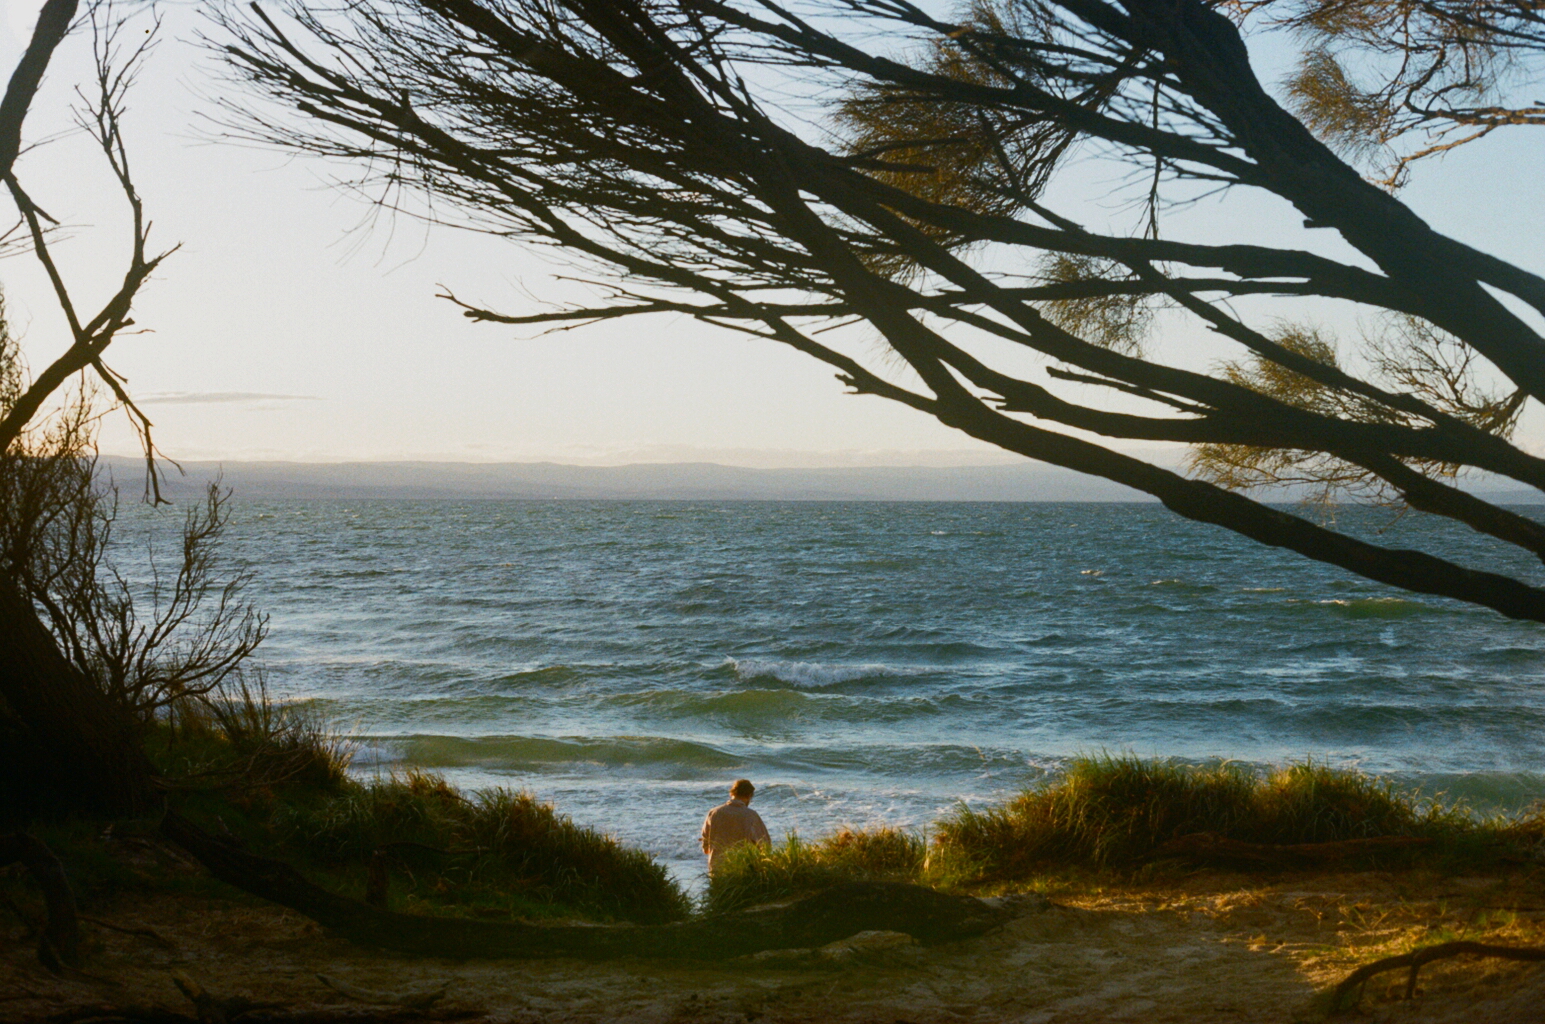
There appears no official name for the little beach we visited. It’s a lovely place.
The bush bash back to the track was a little less so, but in not that much time we found ourselves at the little junction.
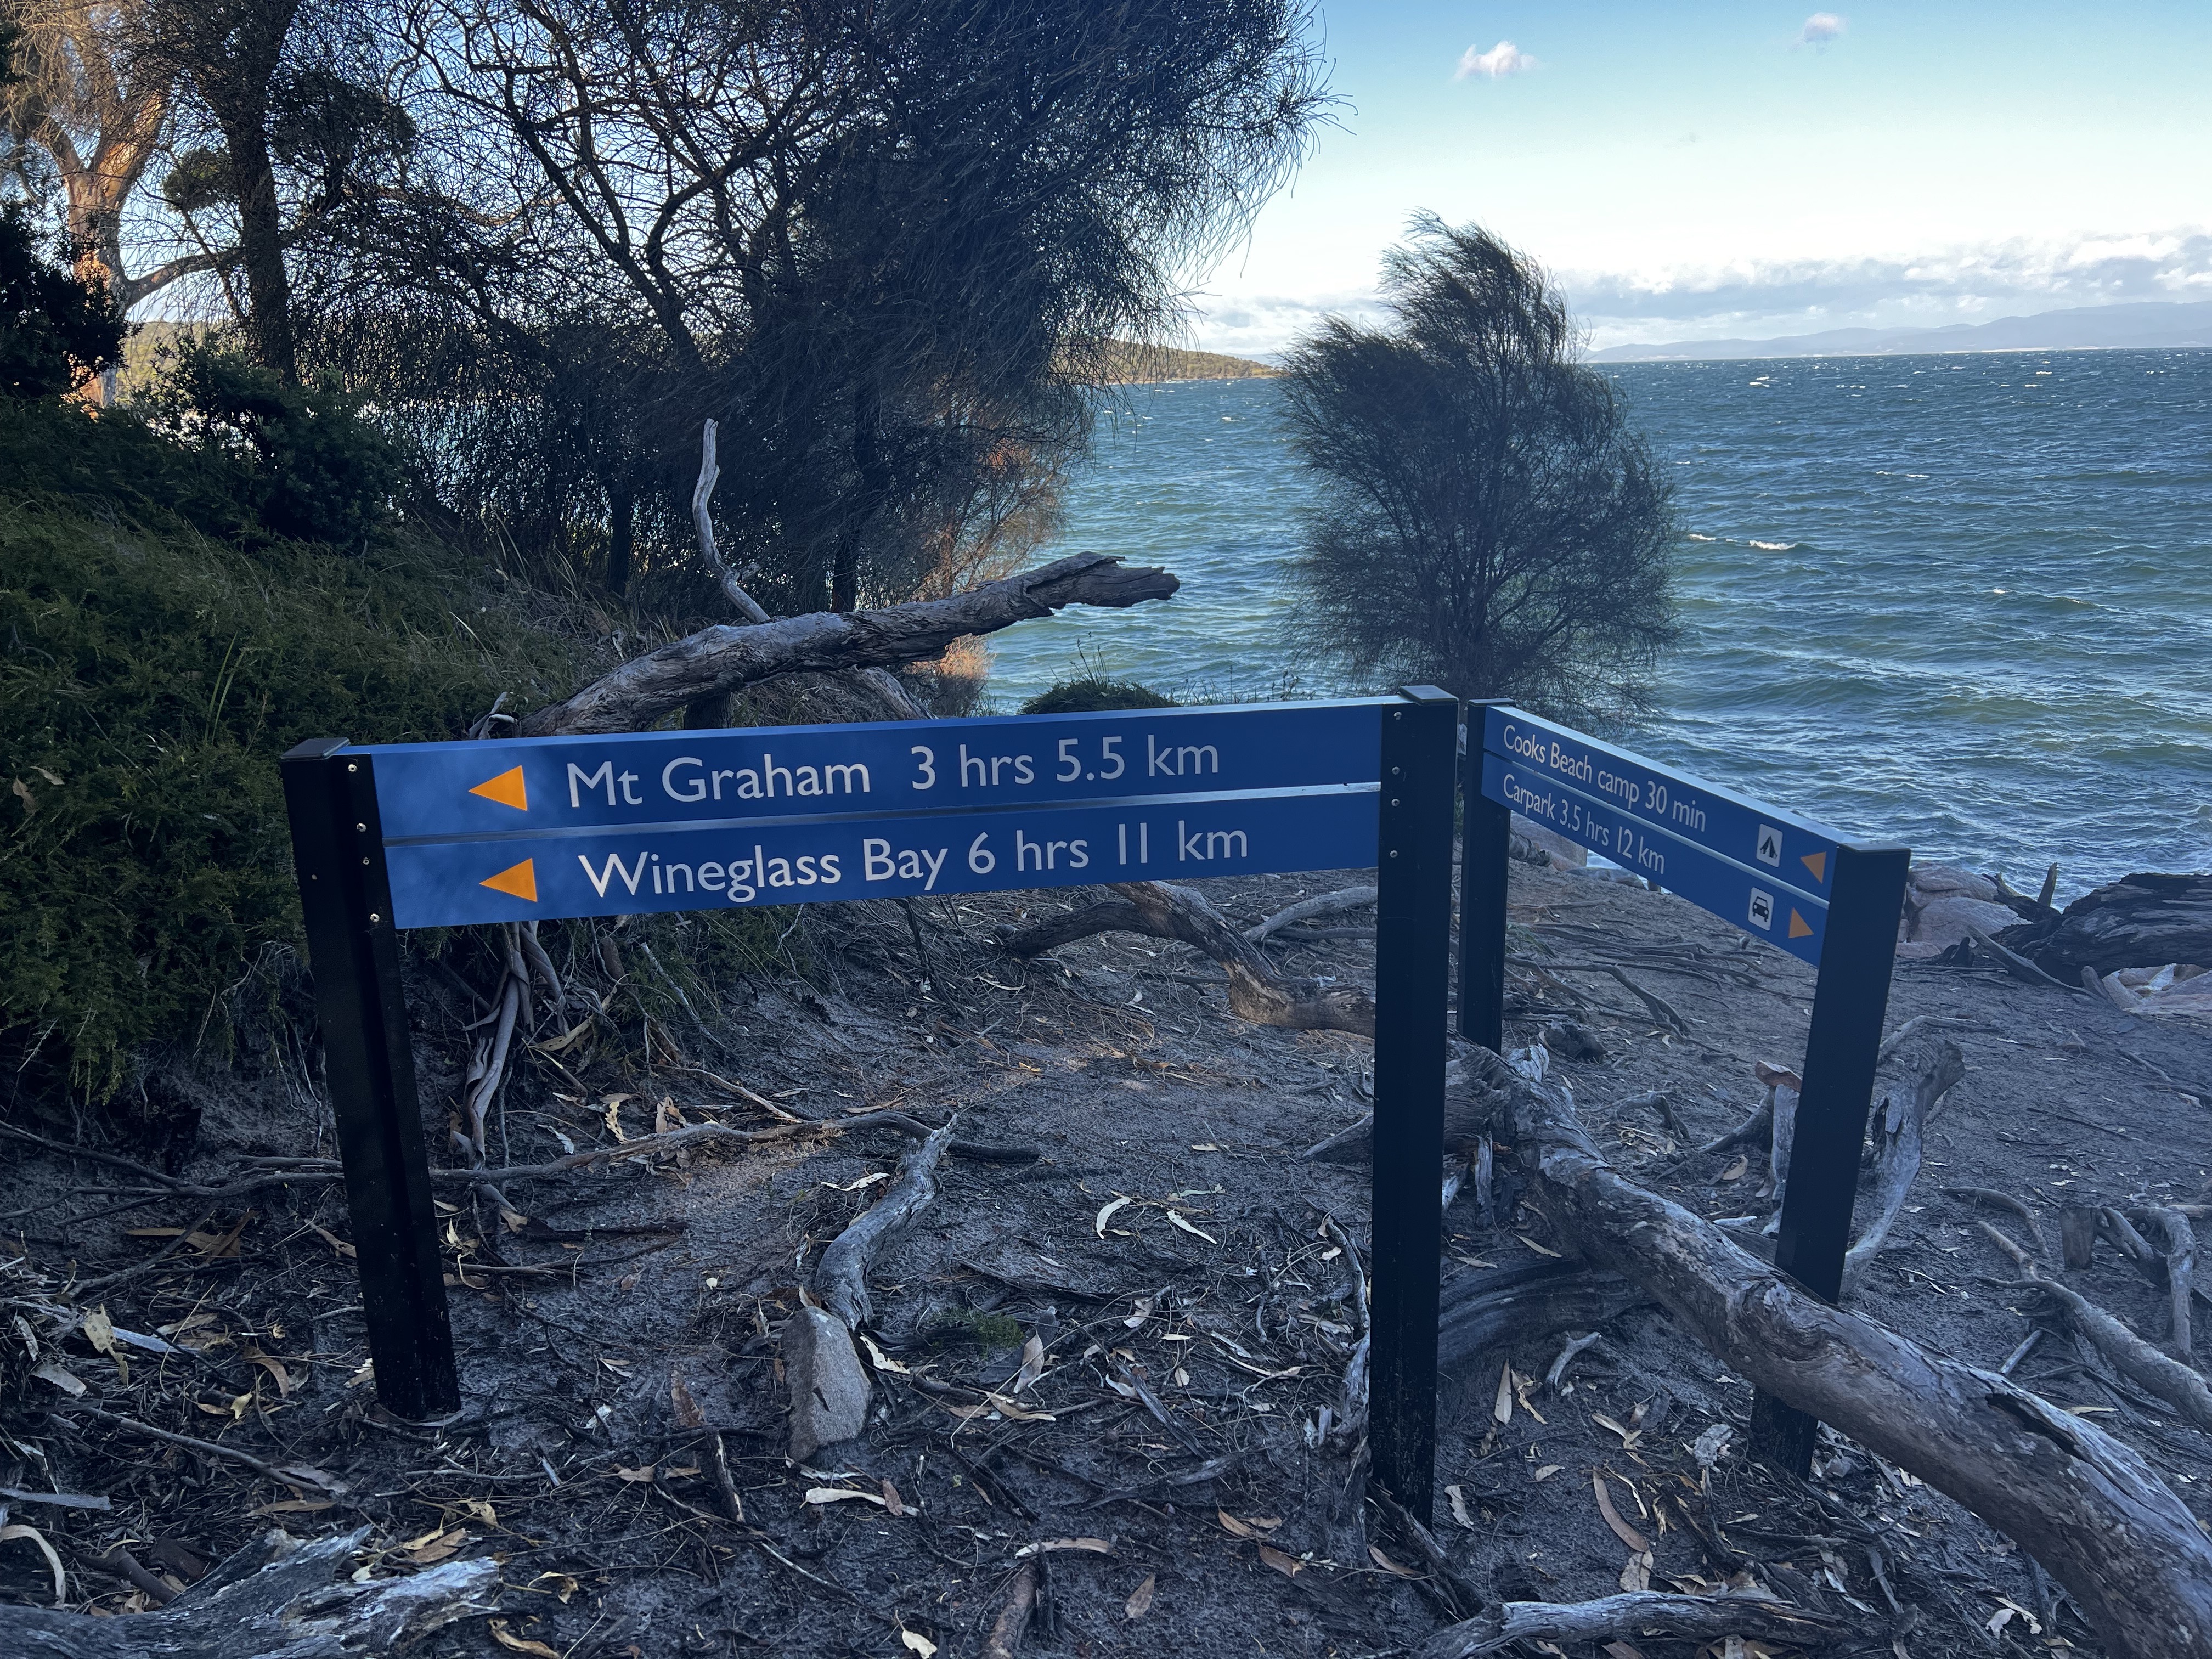
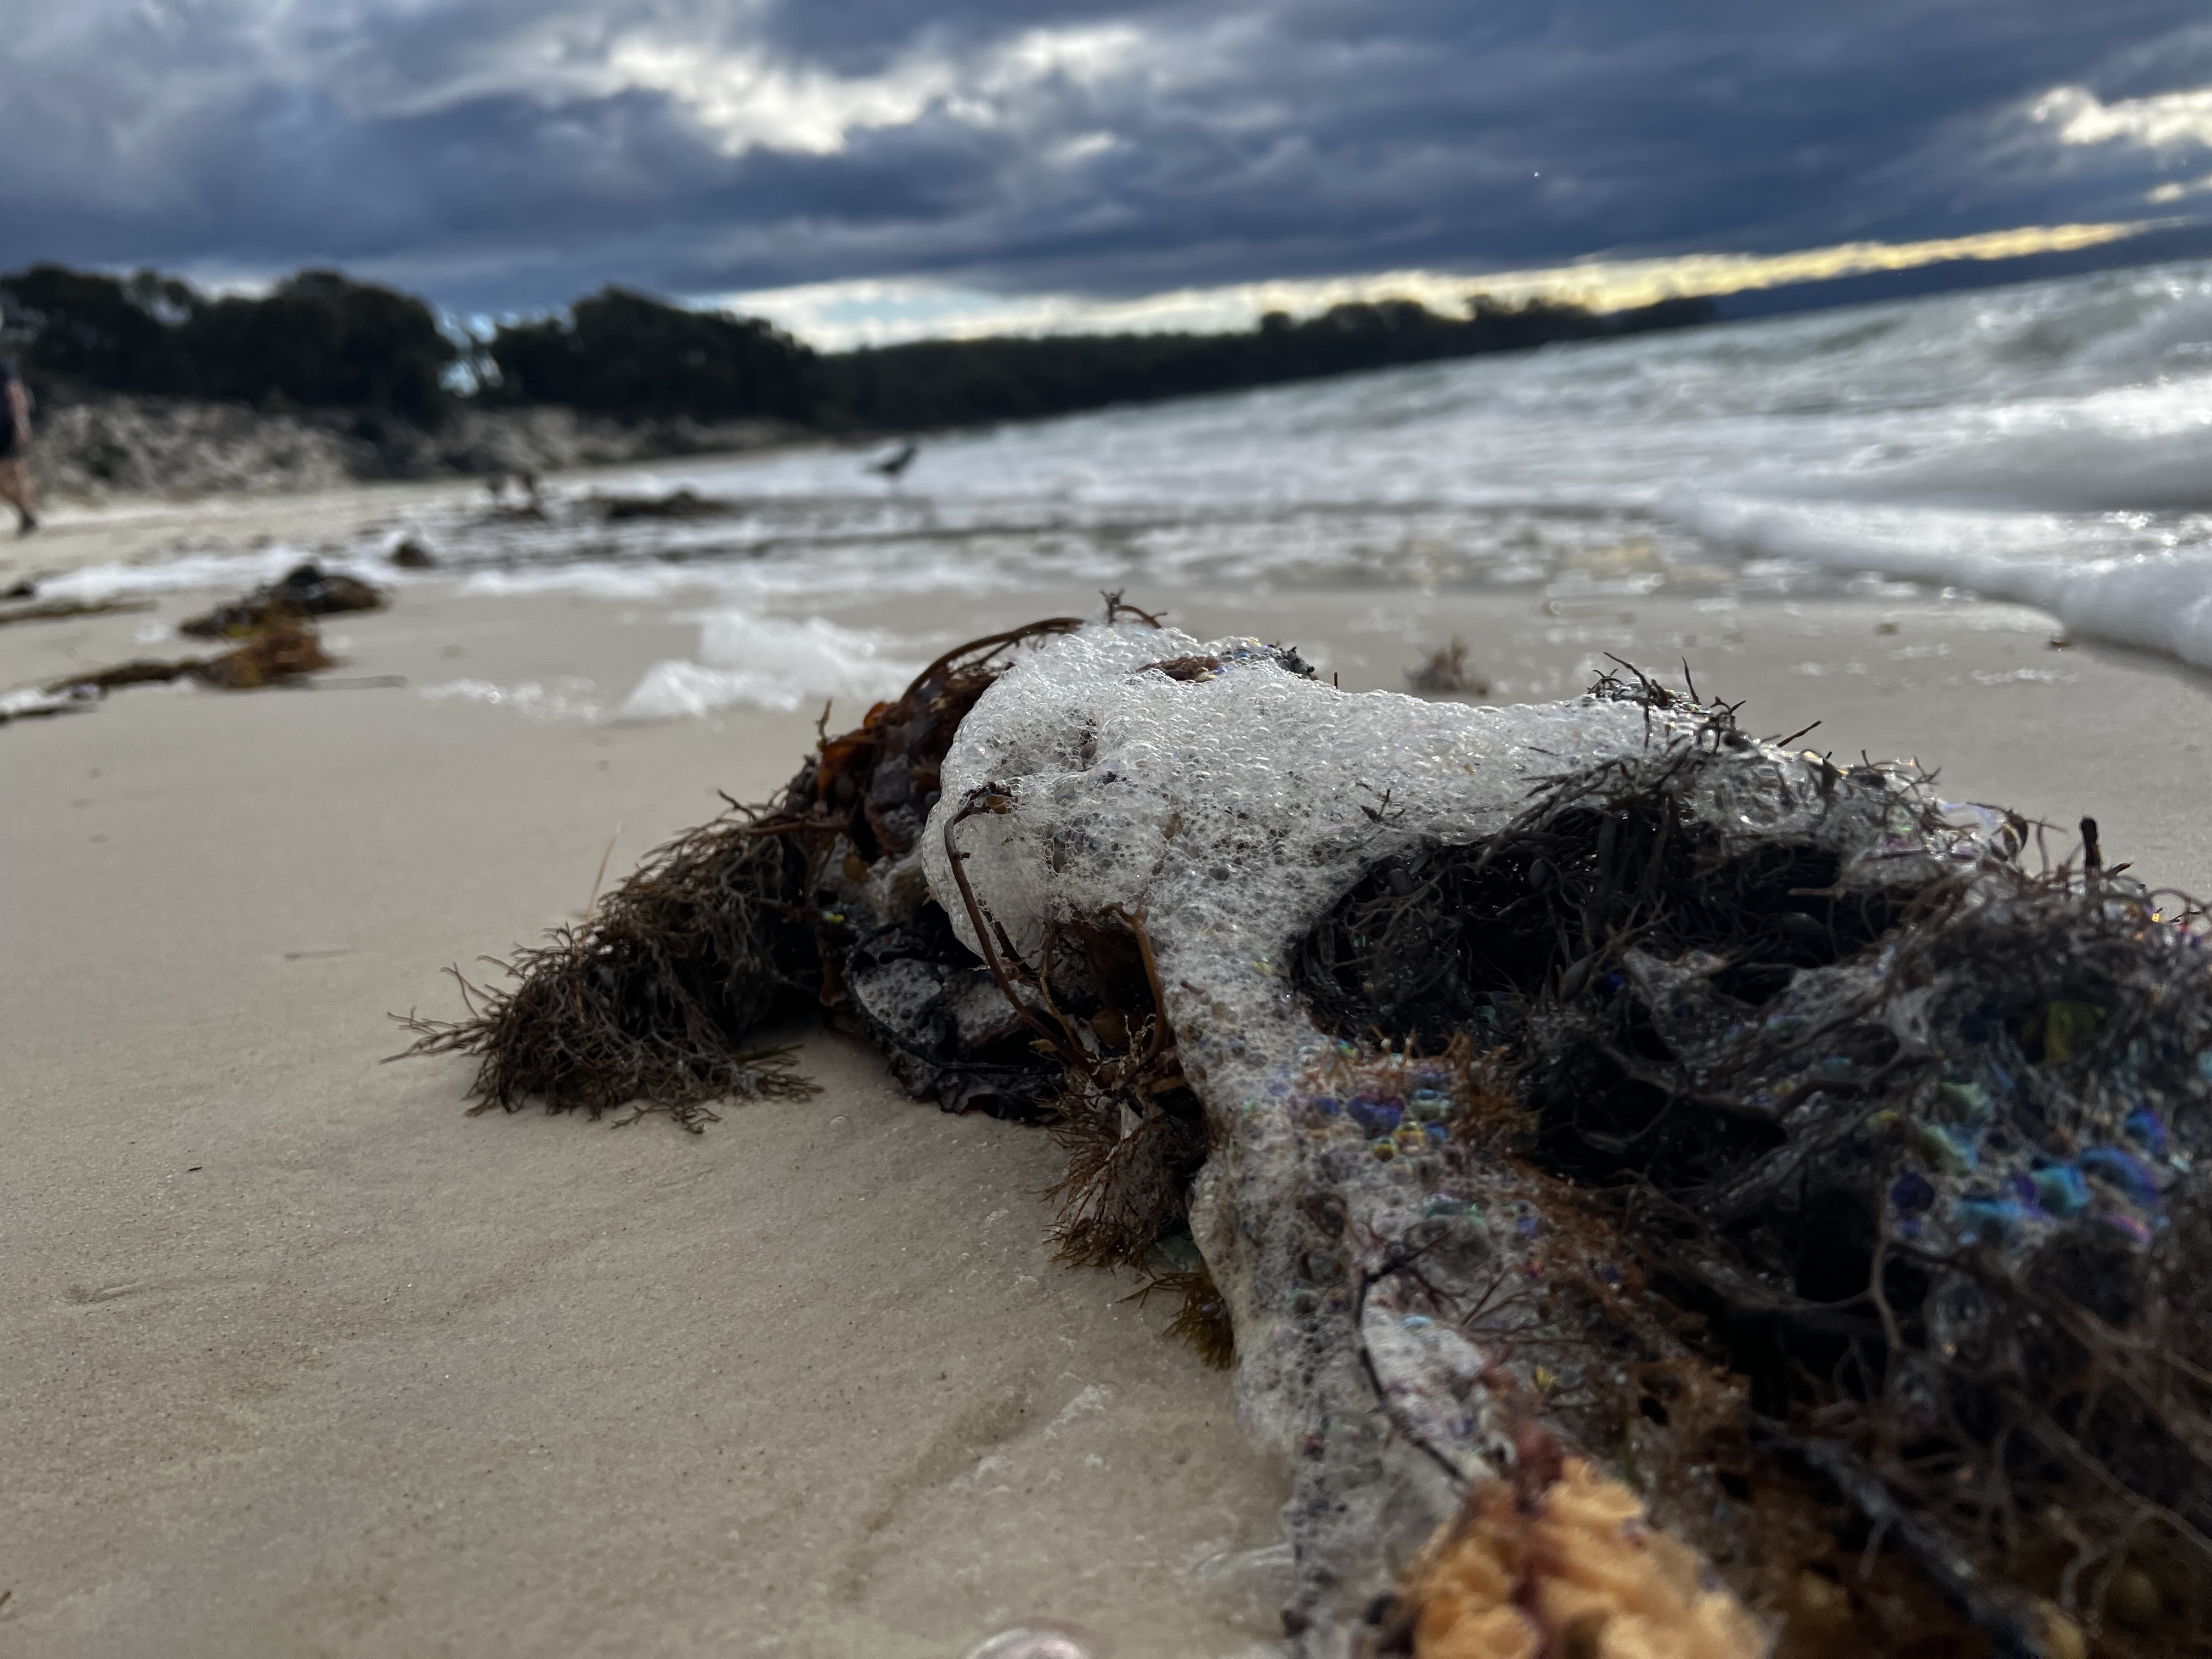
The walk along Cooks was just as nice as all the other beaches we’d been lucky enough to visit that day.
I tried to get a few “arty” pics - and as usual, failed - but it was a lovely walk all the same.
The afternoon was spent looking for an optimal campsite. It was very busy with about 40-50 people in total.

But it still felt as though there was plenty of room. It’s a large area so easy to spread out.
We found a nice spot without any threatening trees above us, cooked dinner and then got a few evening photographs of the Hazards.
I woke around 3am to wind and rain. I checked my phone. A severe weather warning was in place.
I sure was happy I was away from those big branches.
The rain came down. It sounded like heaps and heaps - it probably wasn’t that much.
Eventually I fell back asleep. The storm moved on.
Day 2: Cooks Beach to carpark via Mount Graham
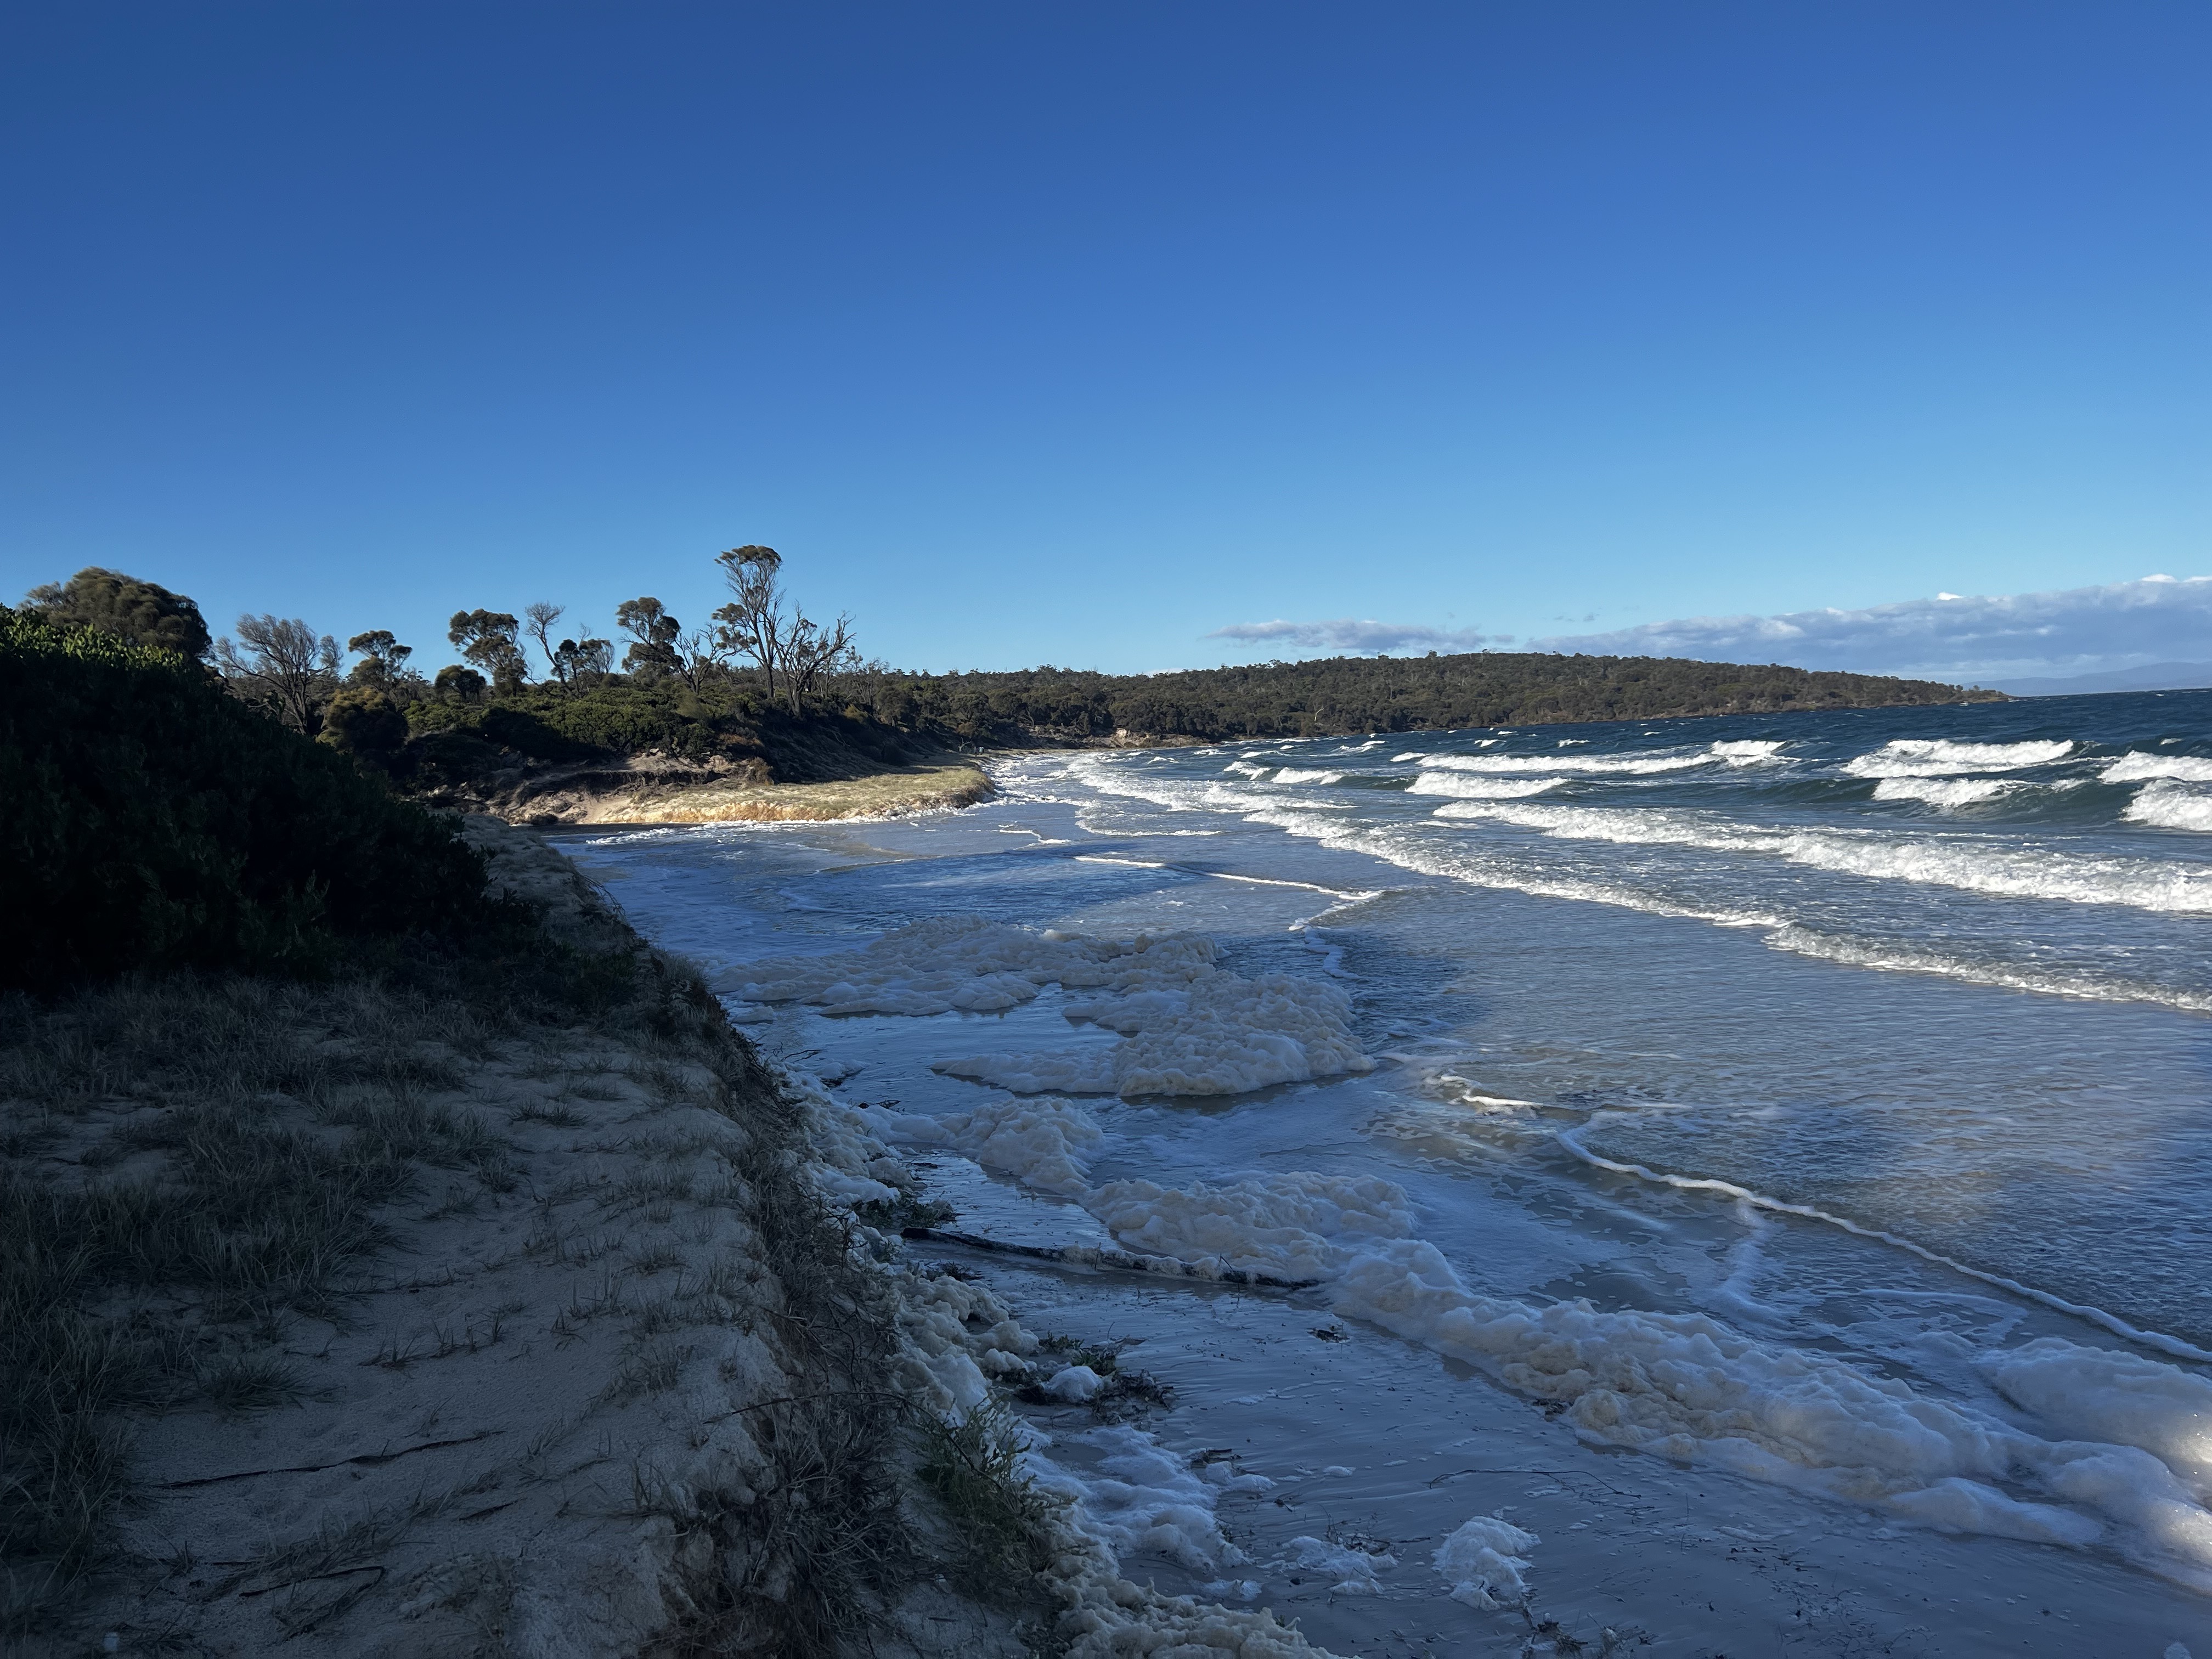
The weather was noticeably windier and less stable the next day.
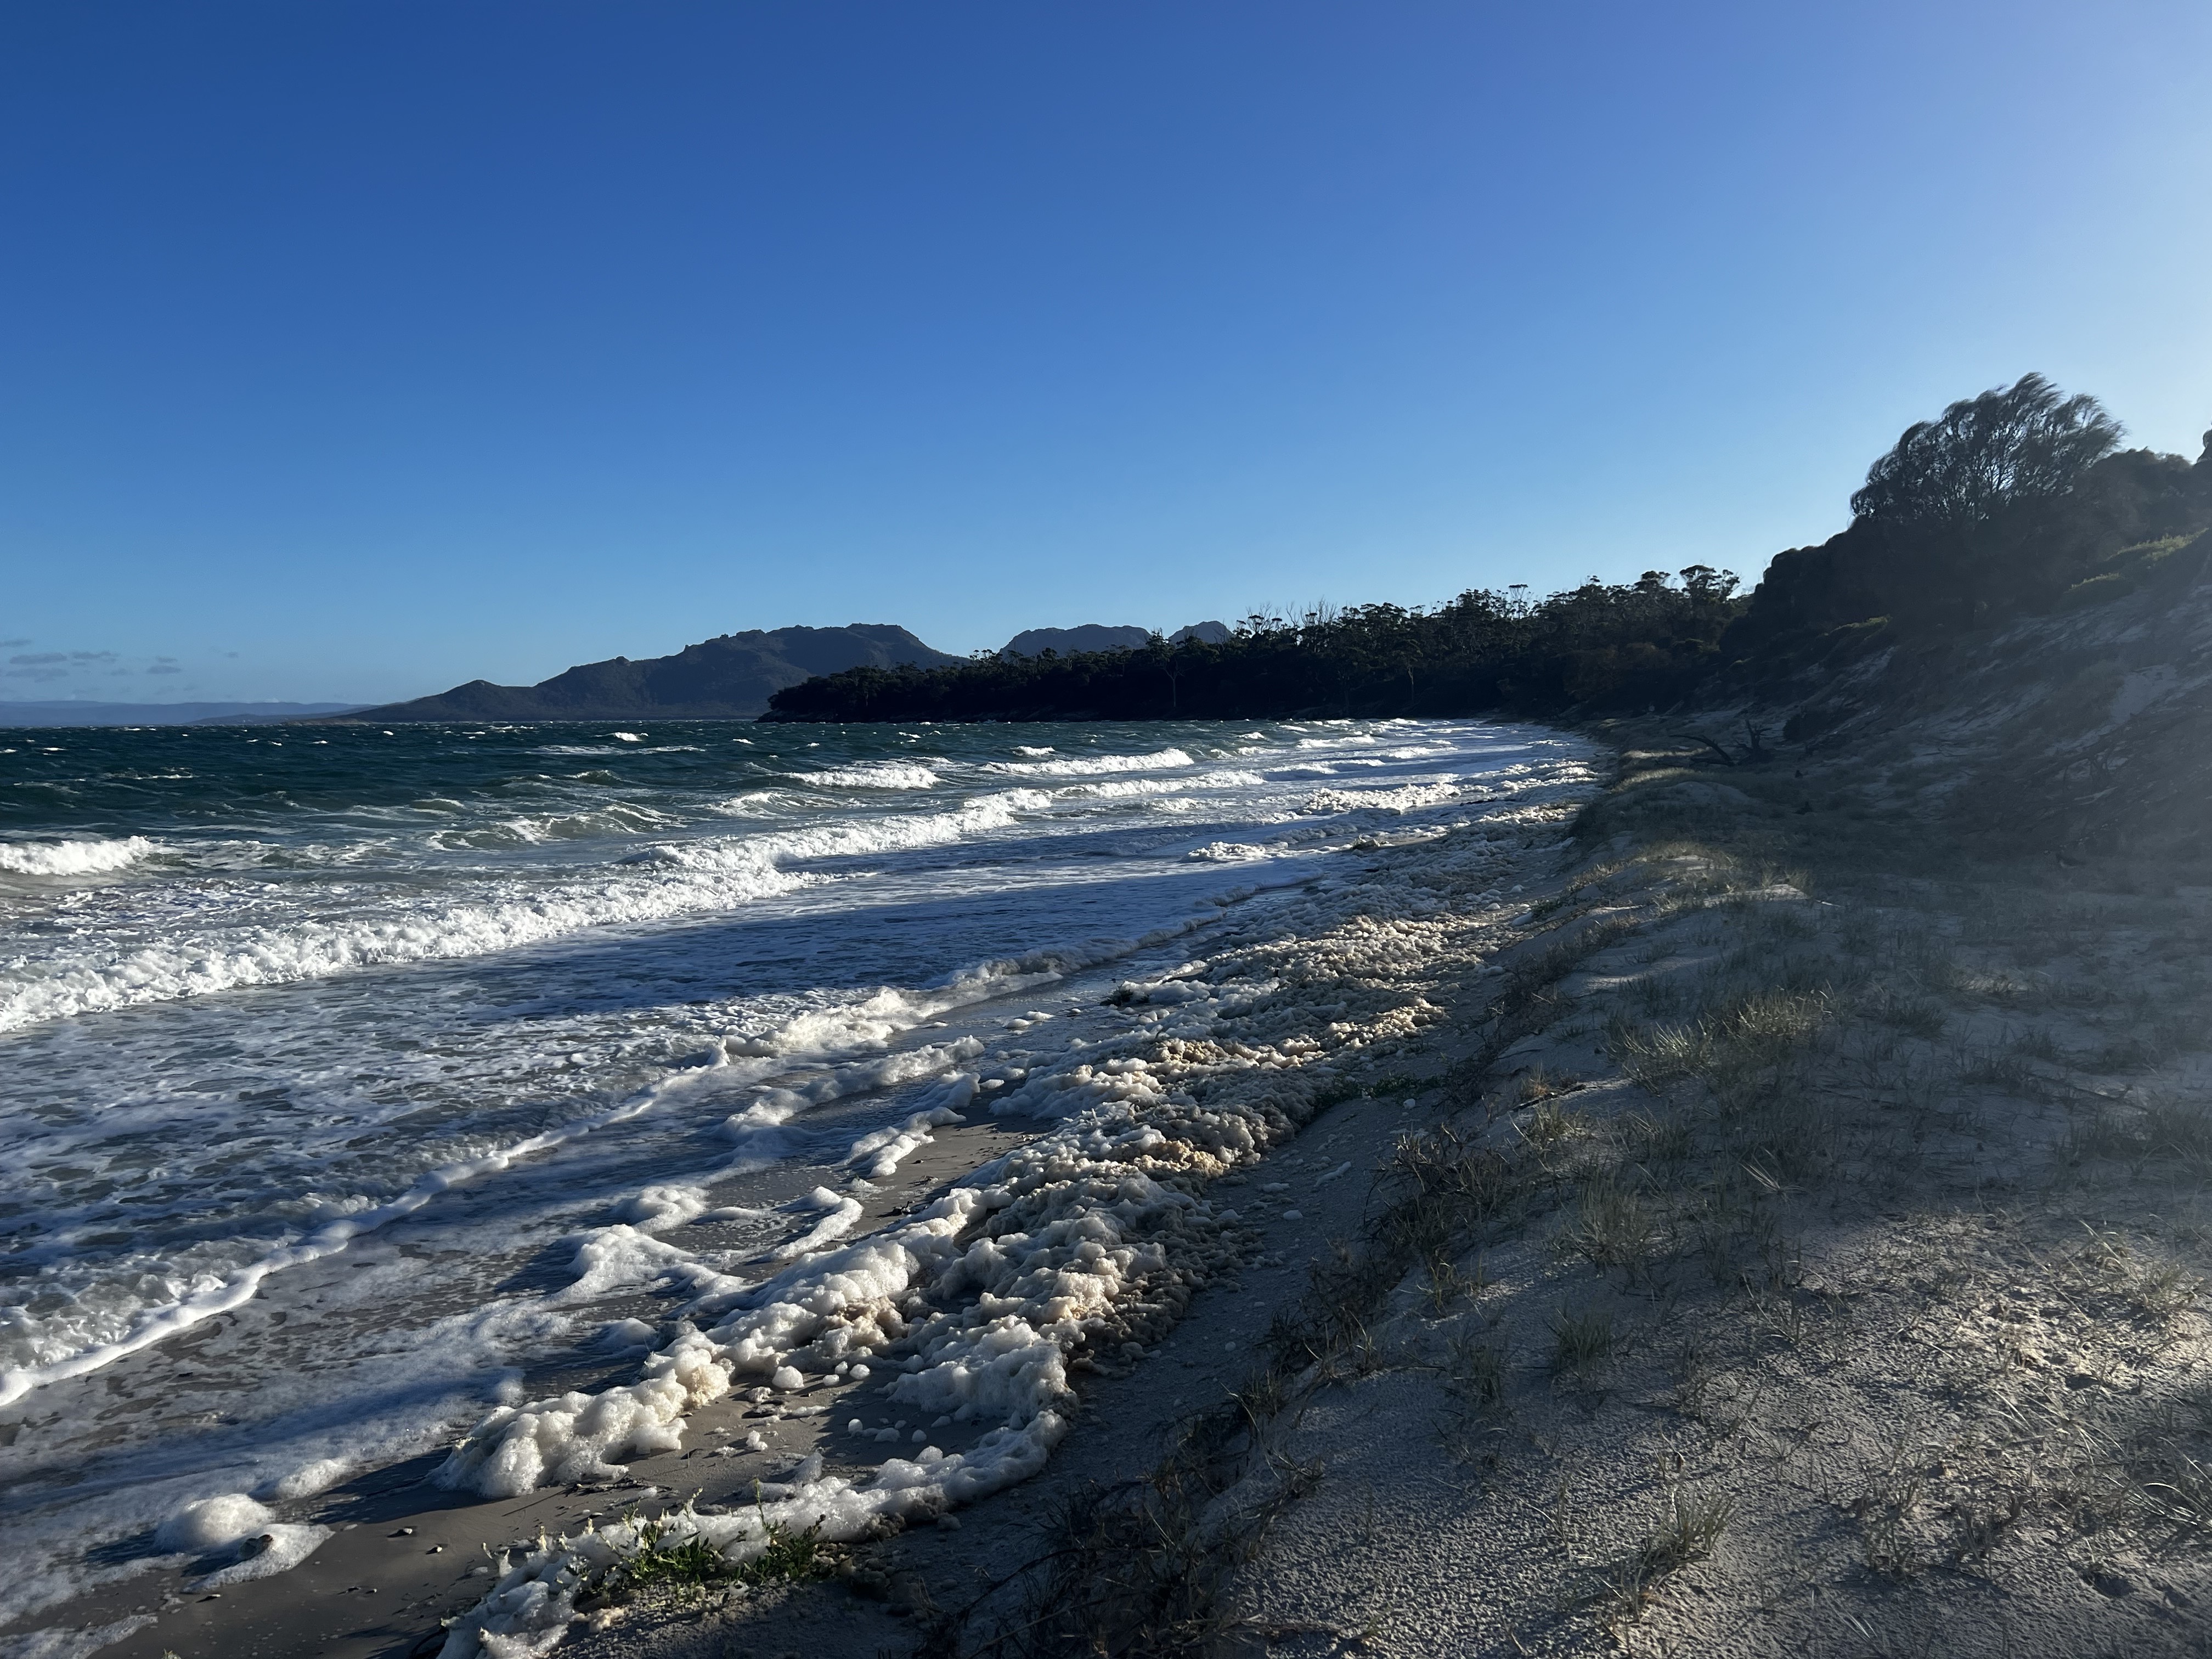
The tide was also well in, making it guaranteed we’d be getting wet feet in the walk back to the track.
The aim of the day was to walk back to the carpark, via Mount Graham.
The walk starts off through dense bush, but on a easy to follow track.
It slowly climbs and the views peep through the trees.
Eventually, after walking almost right around the back of the mountain, you start a steeper climb up the mountain itself.
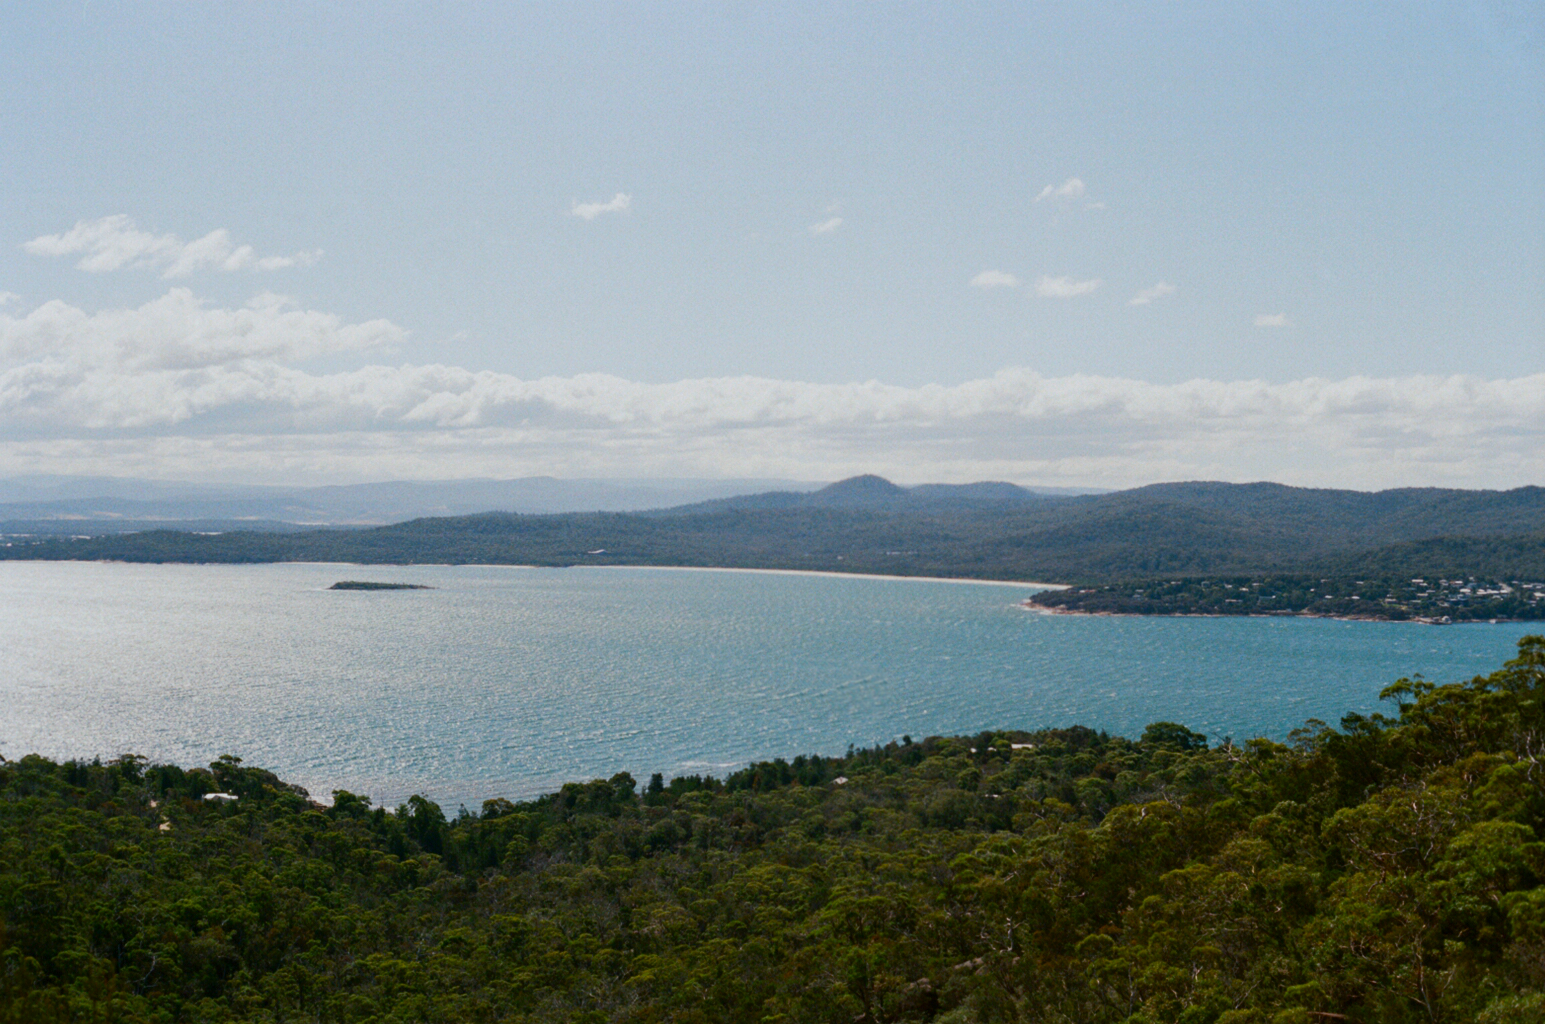
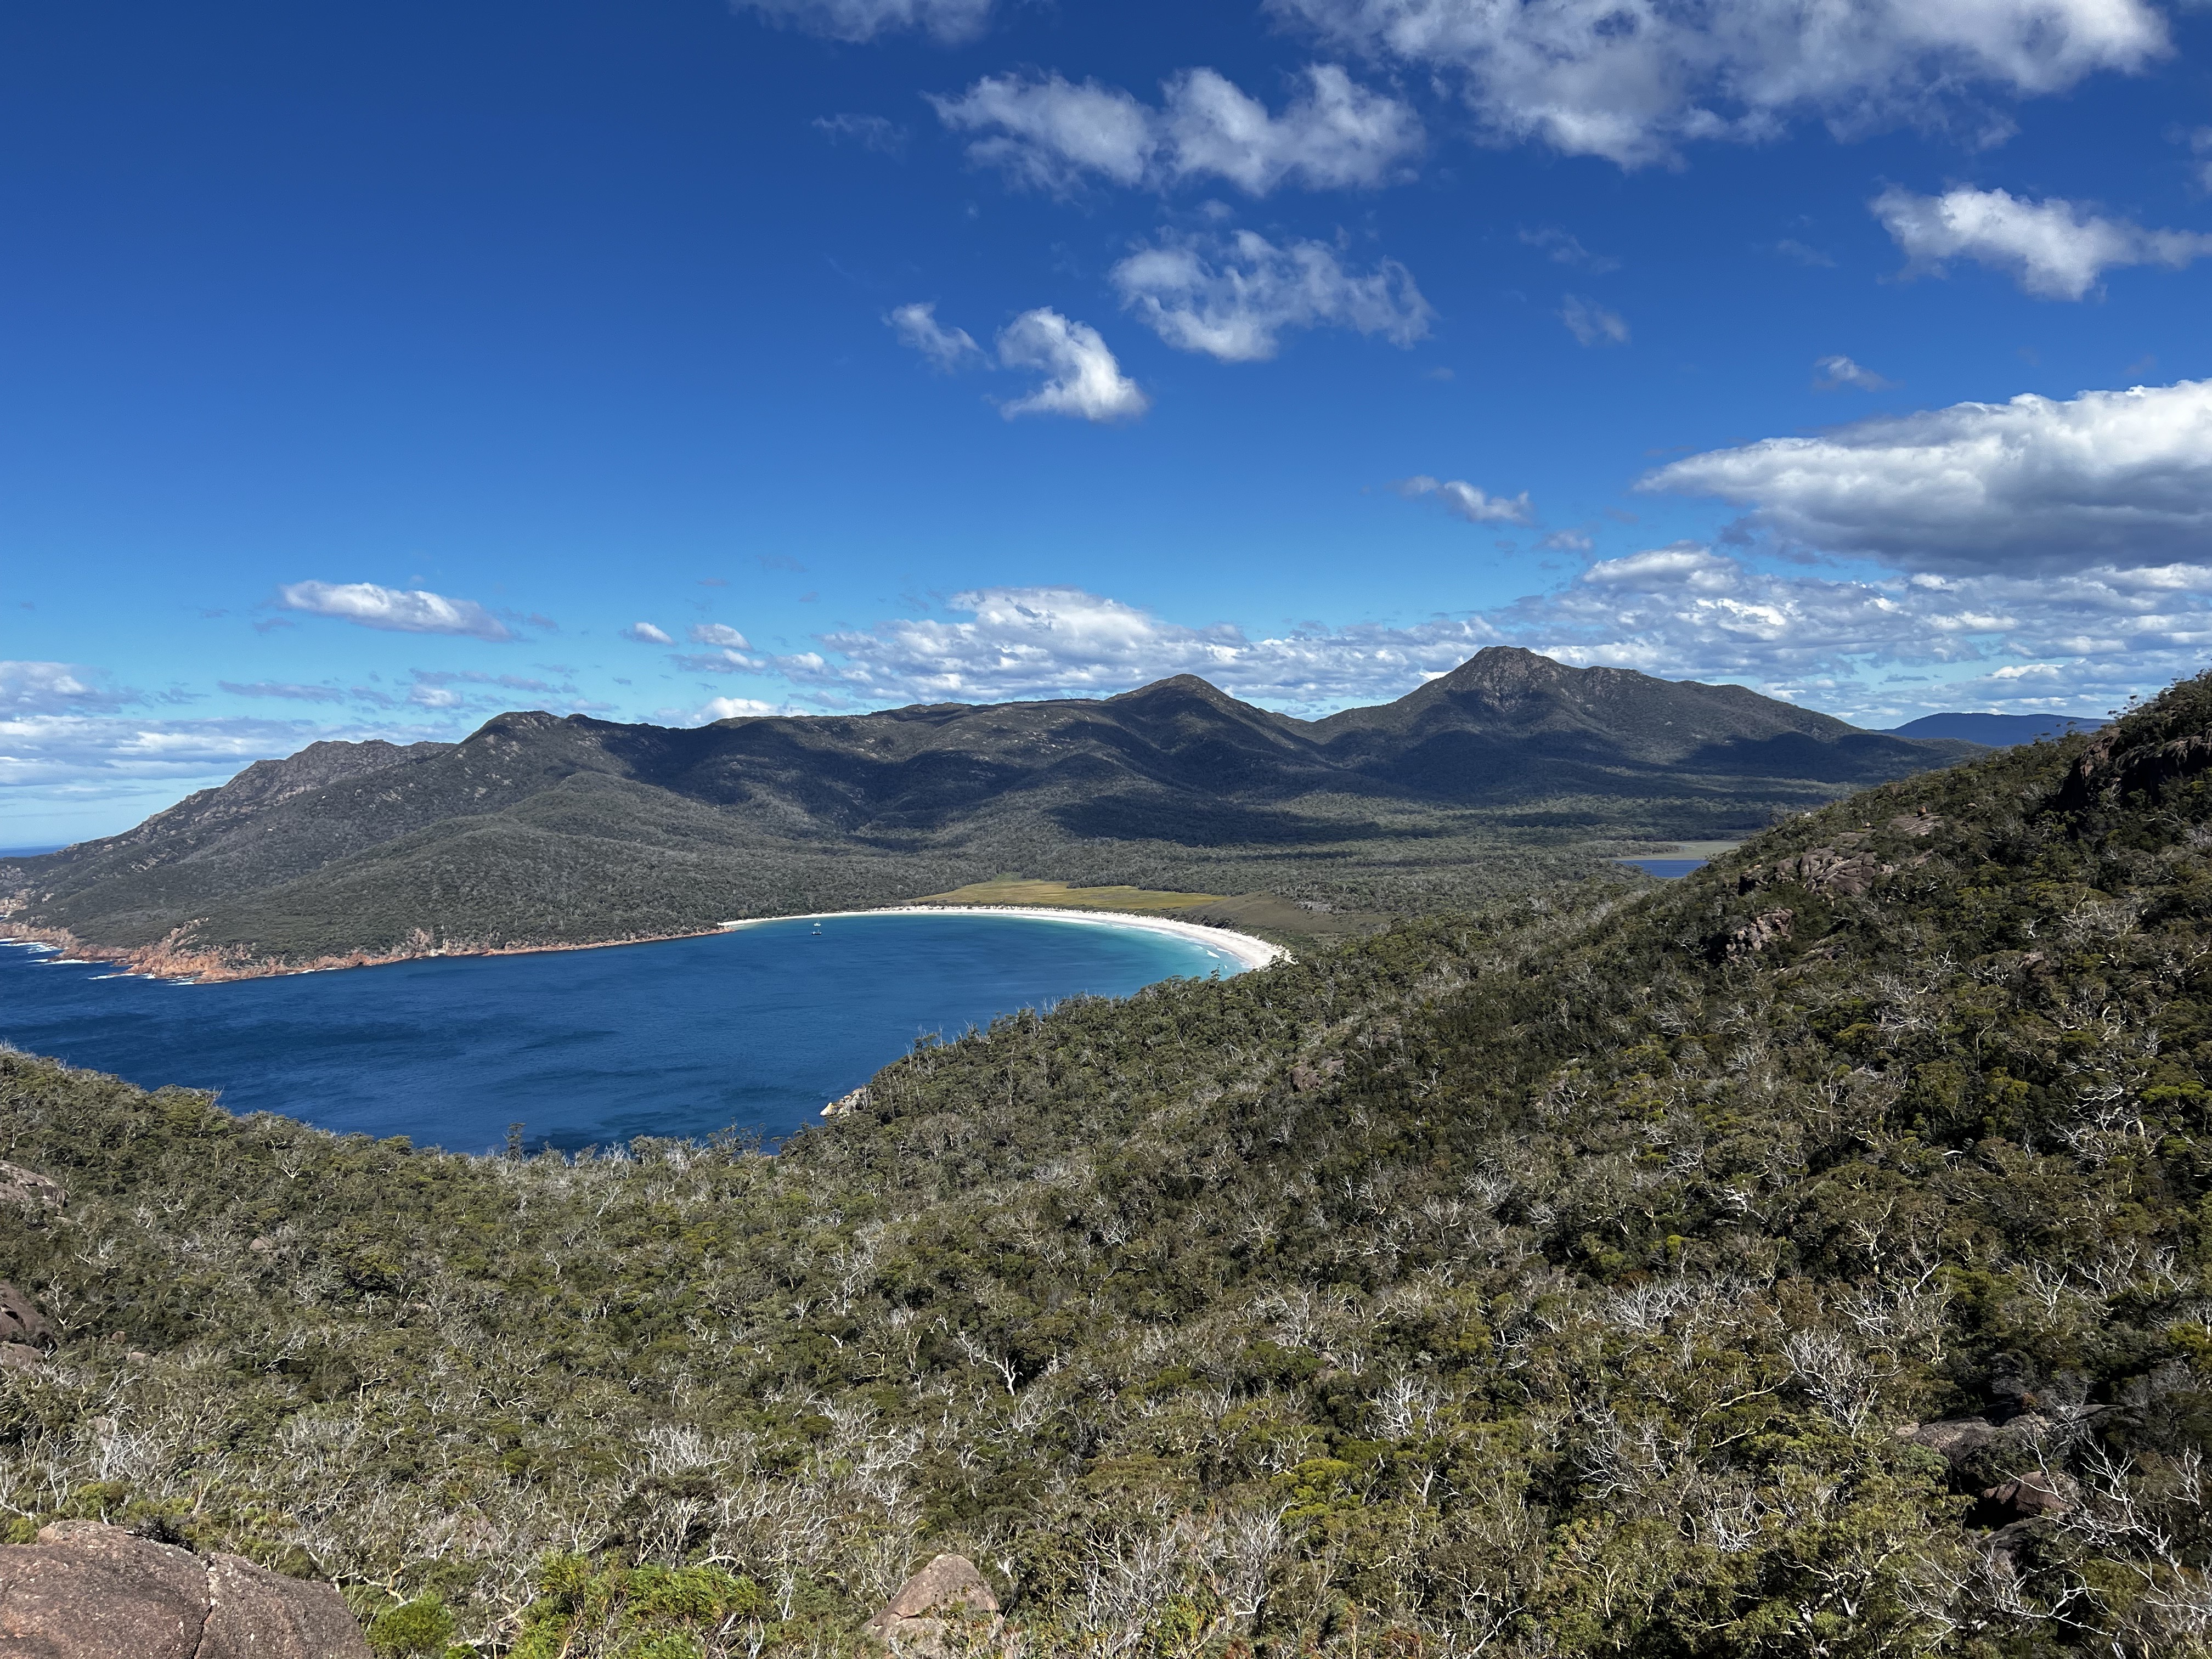
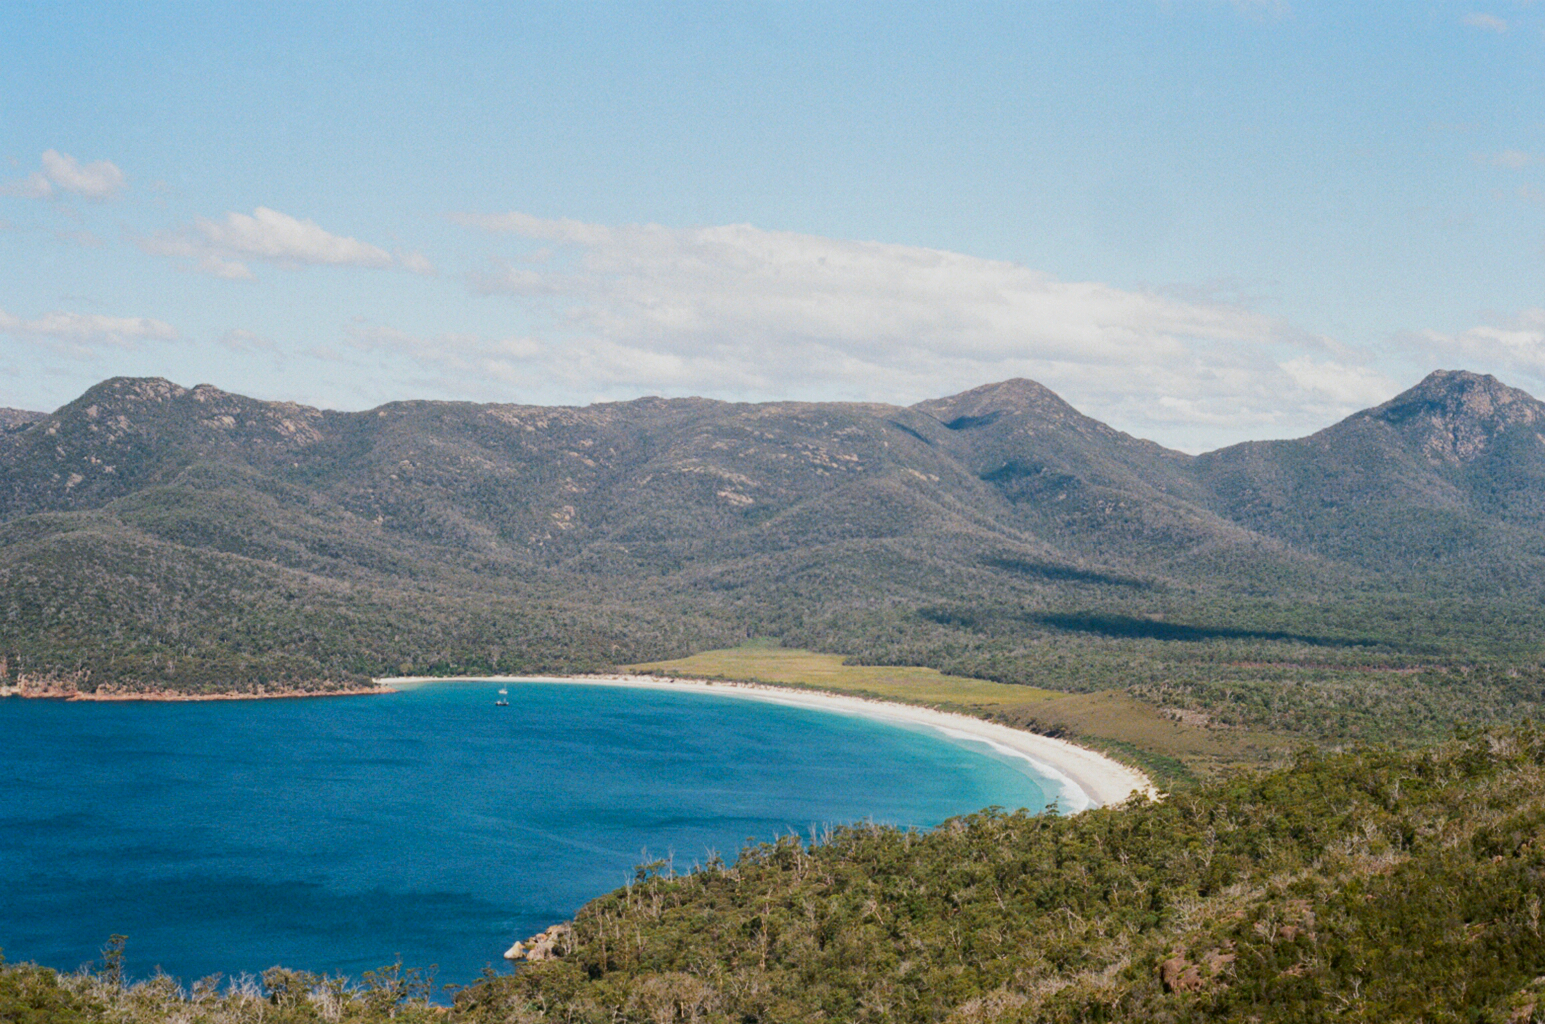
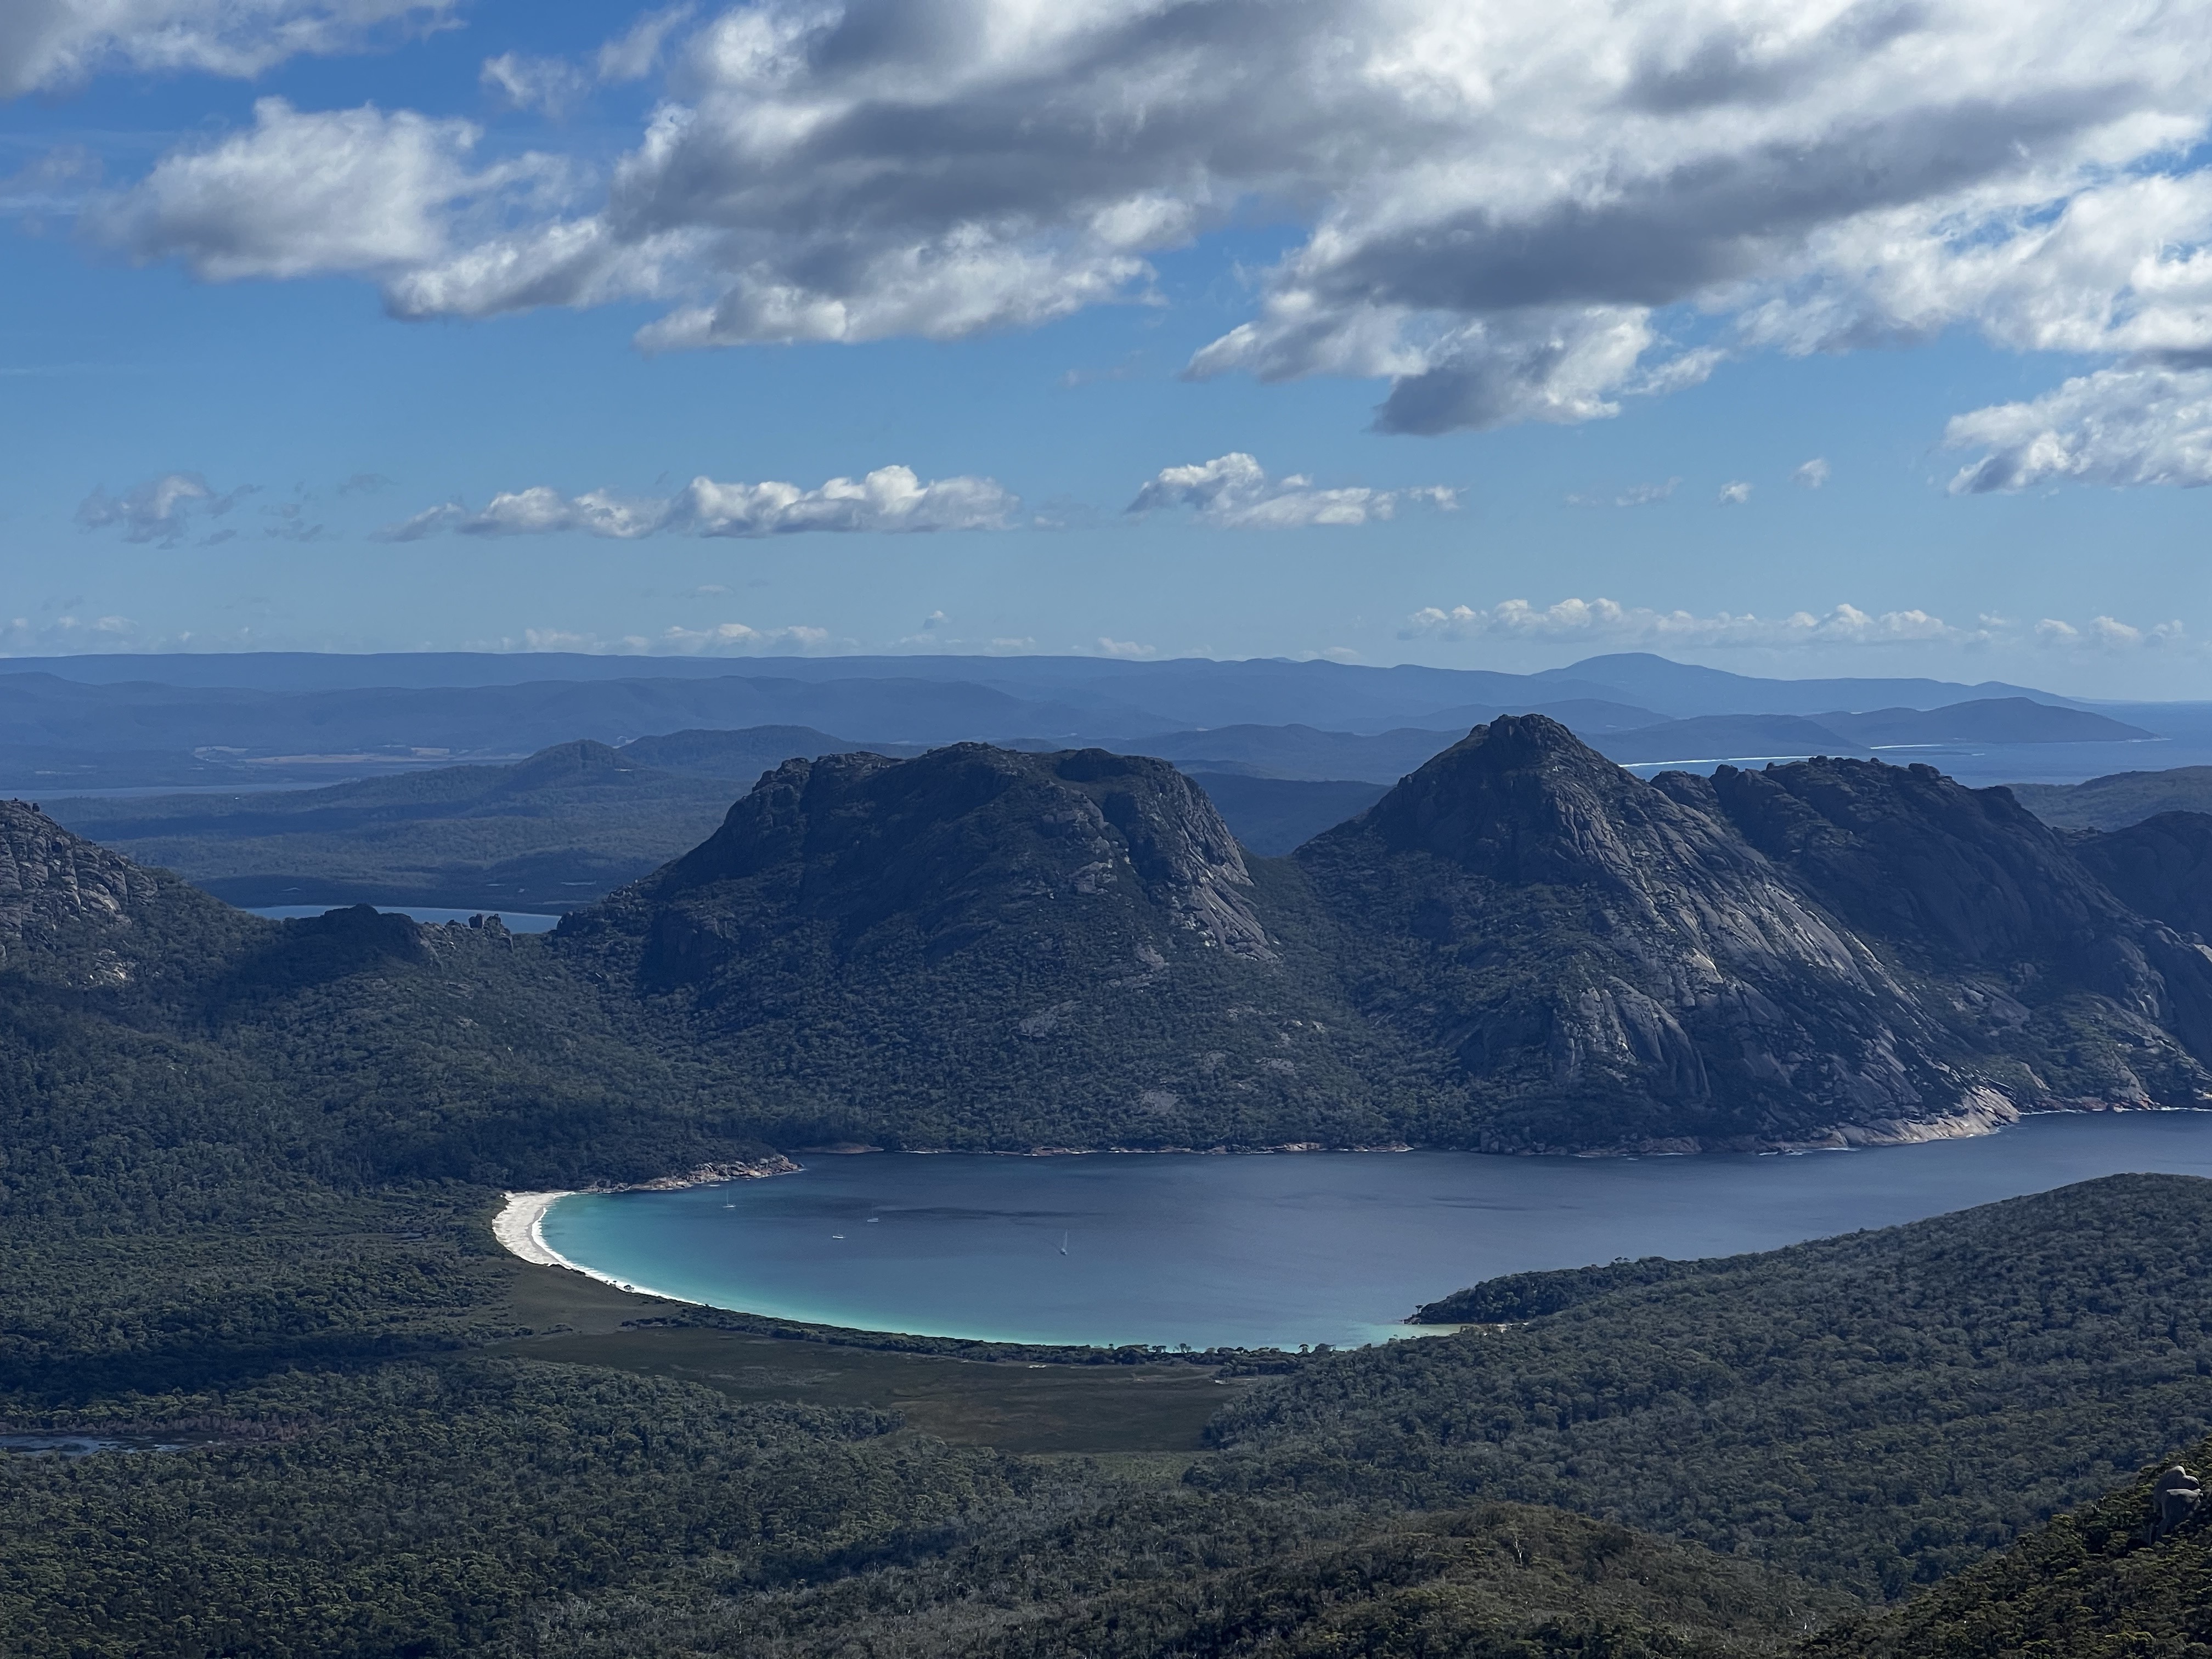
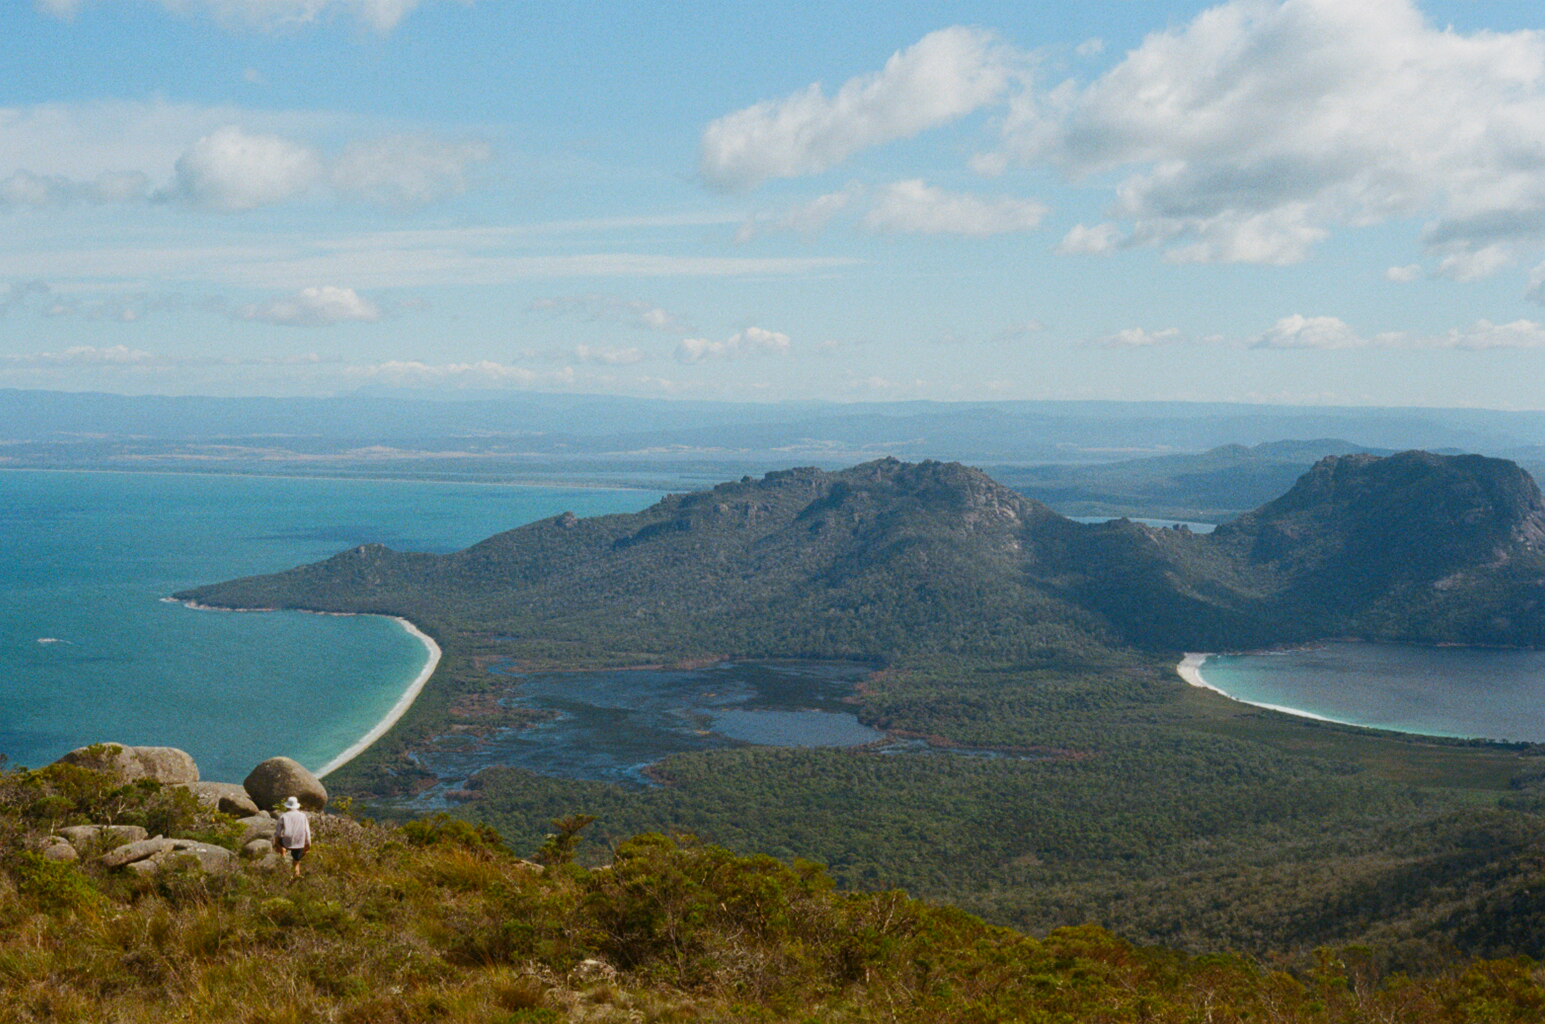
Up and up you go, and eventually pop out right at the top. But the views you get along the way are lovely.
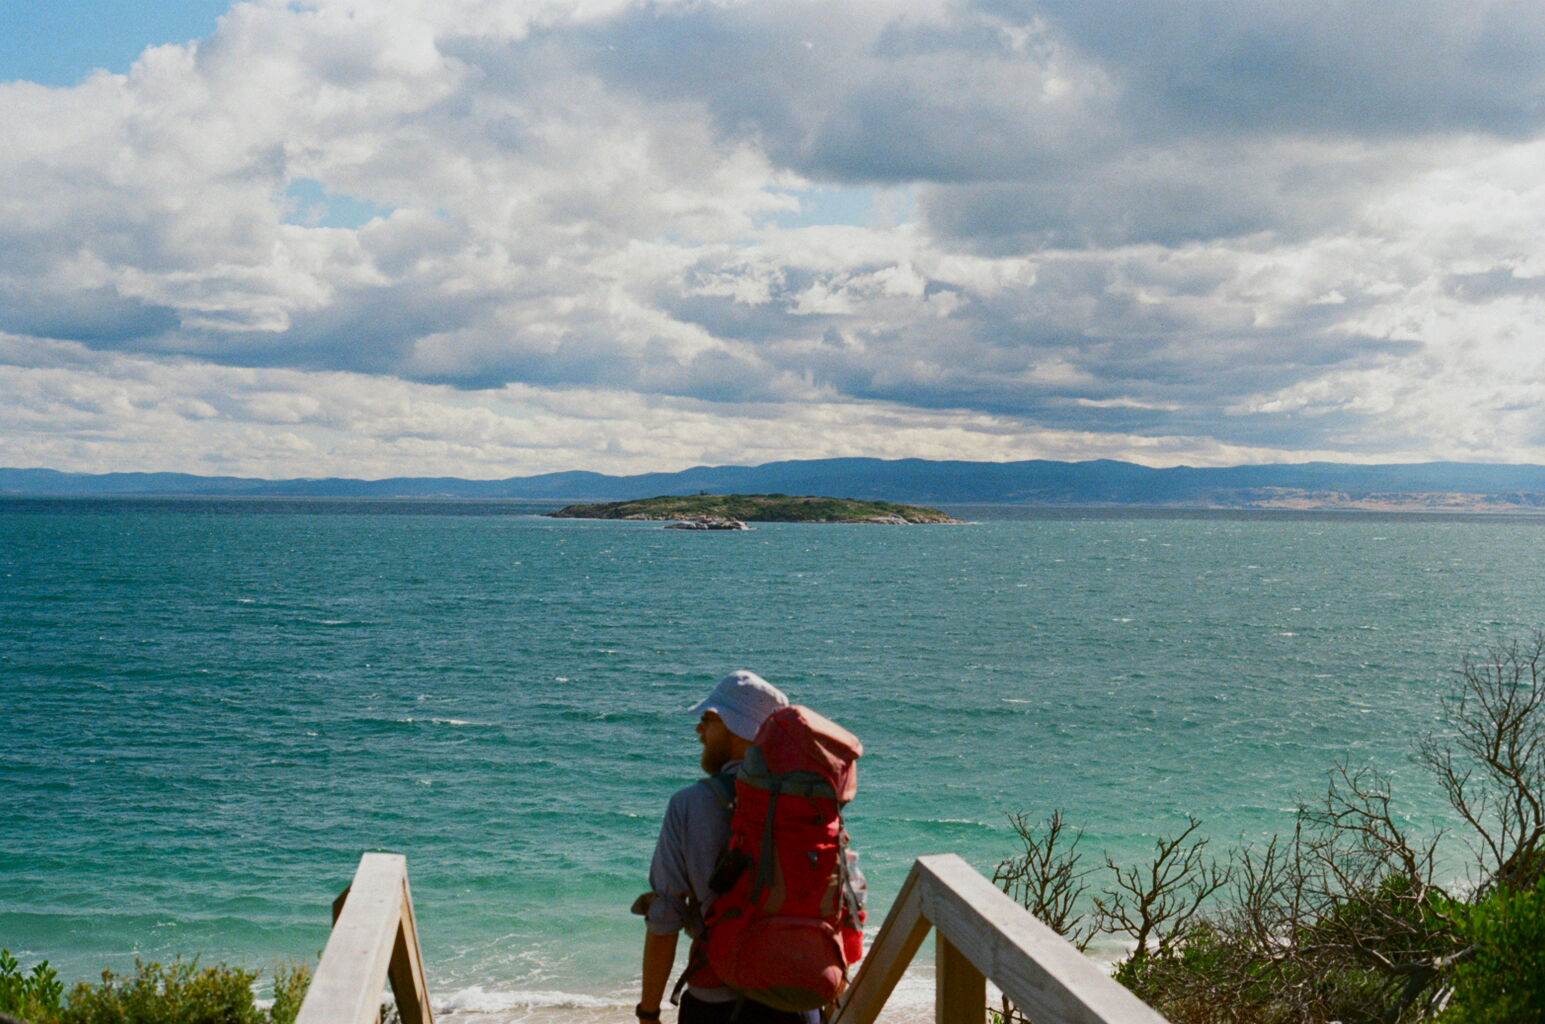
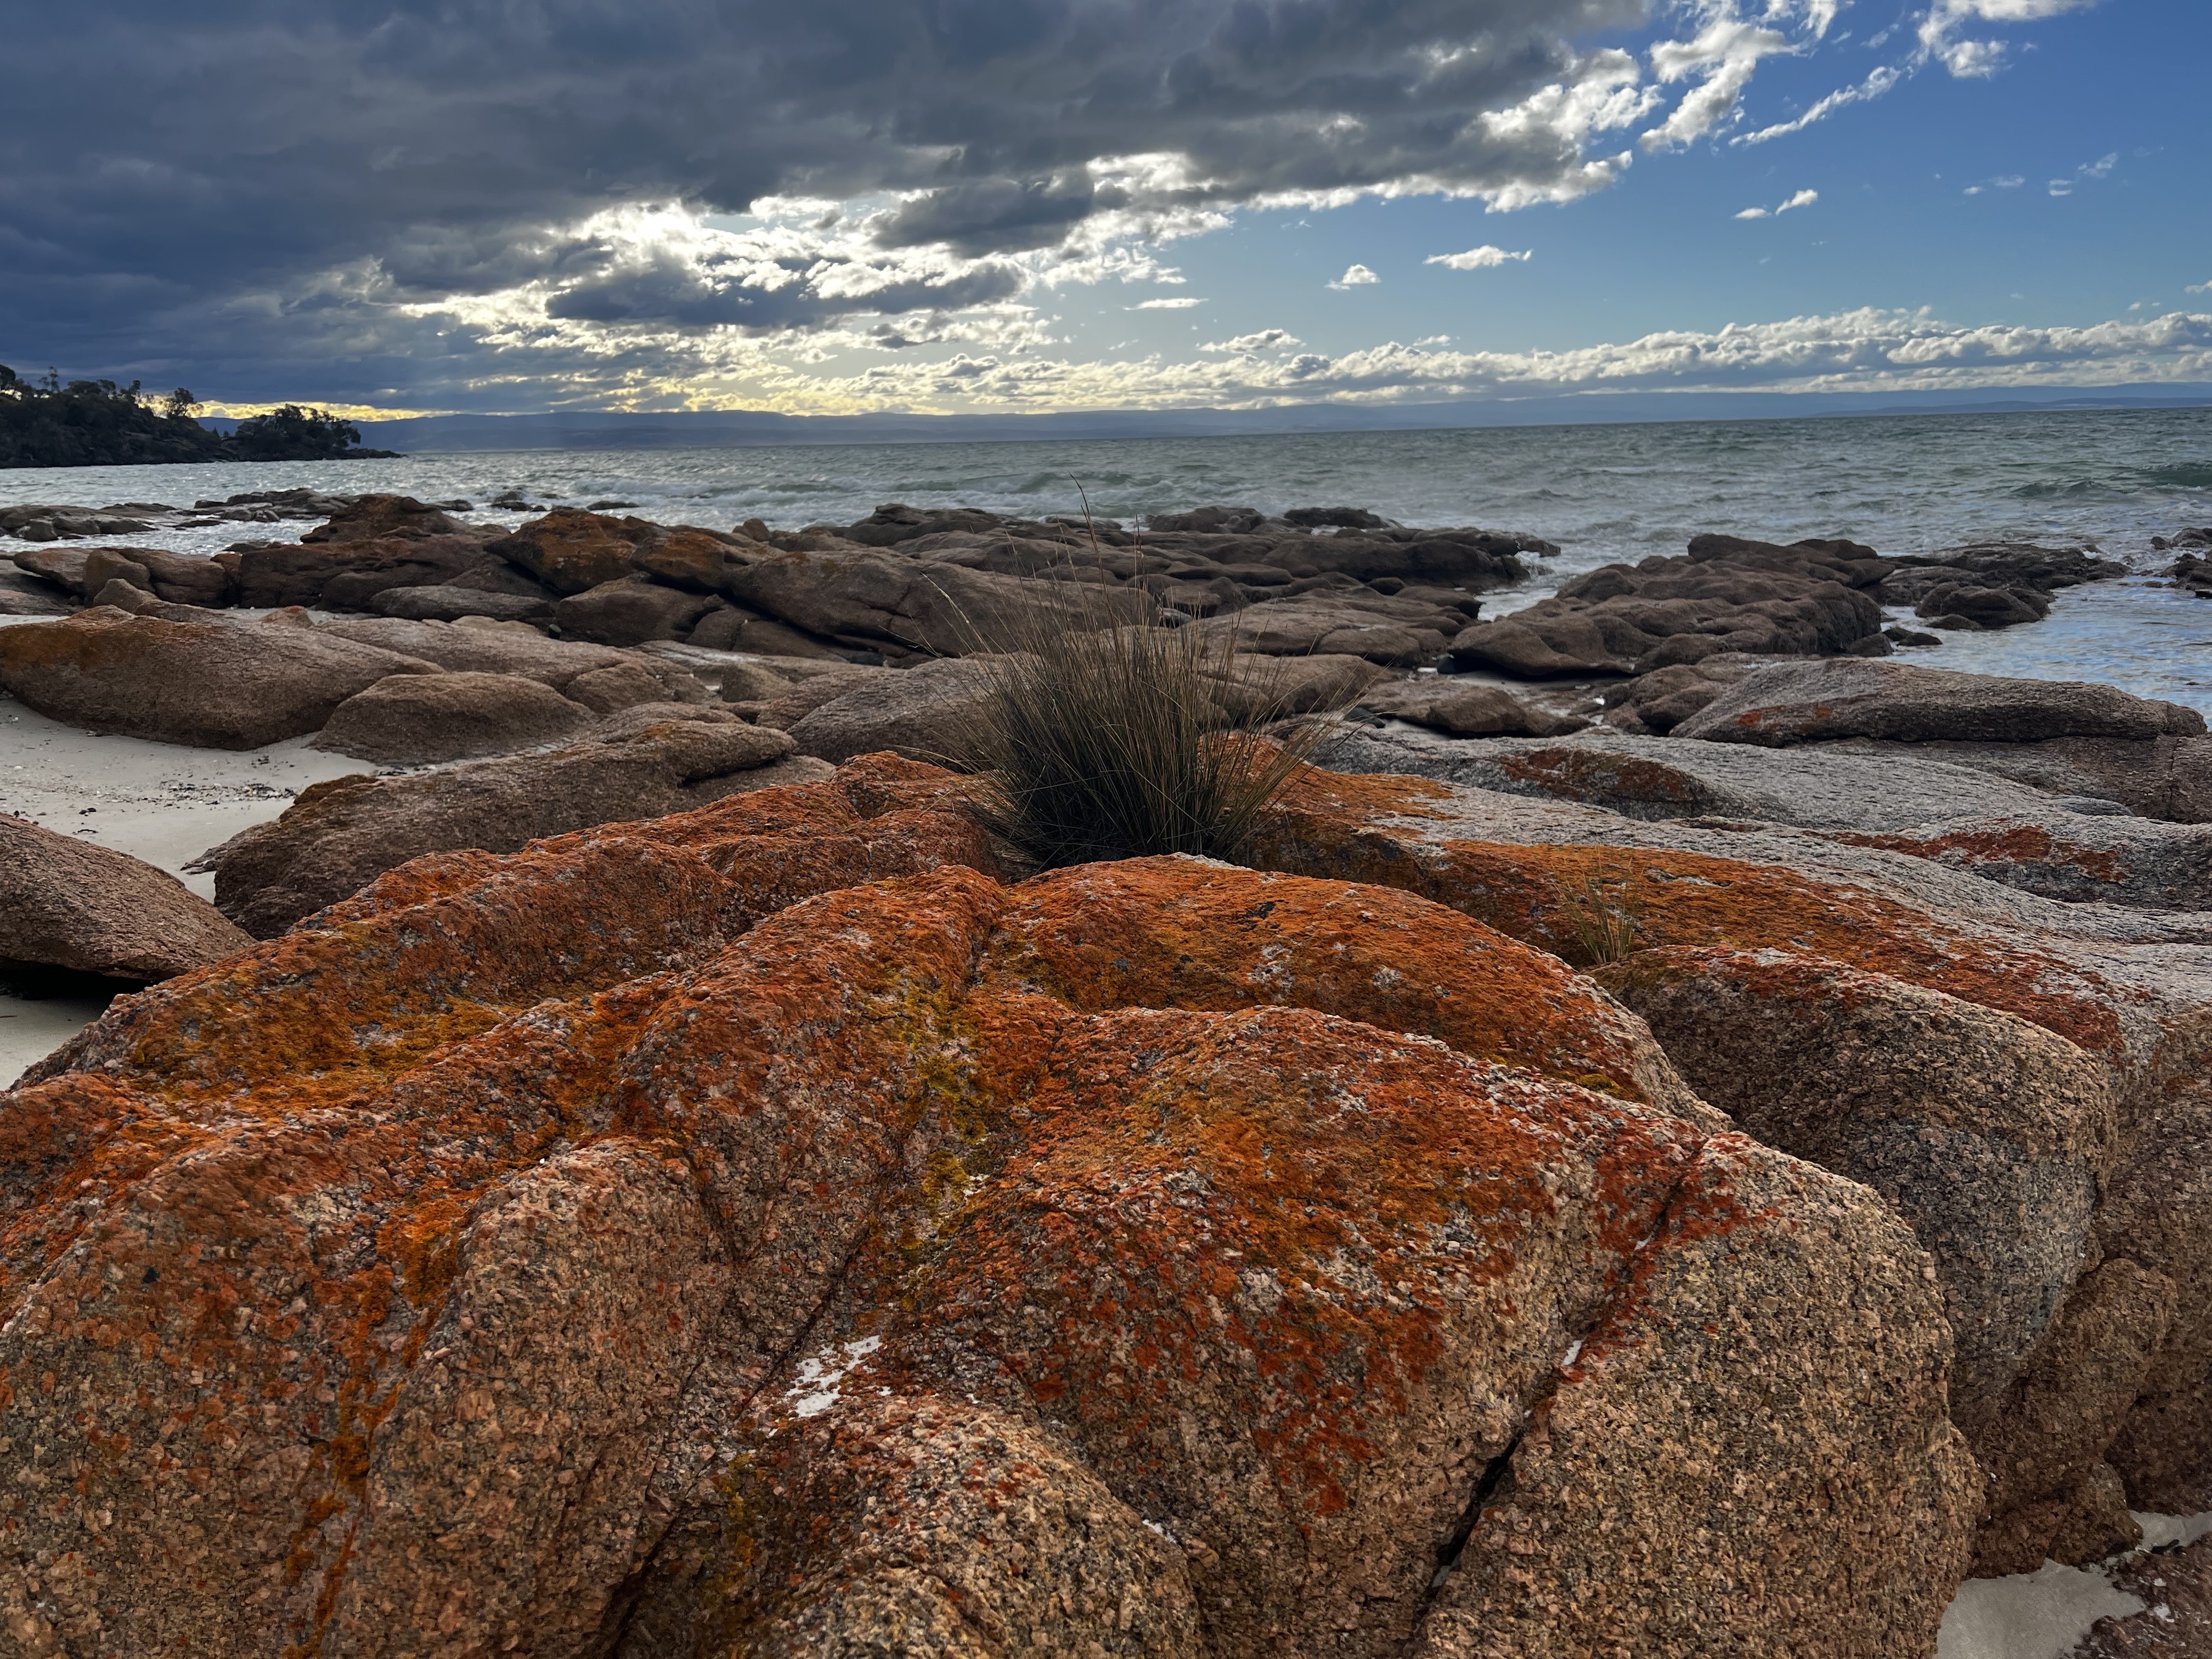
You can look south down to Schouten Island or just way out to sea.
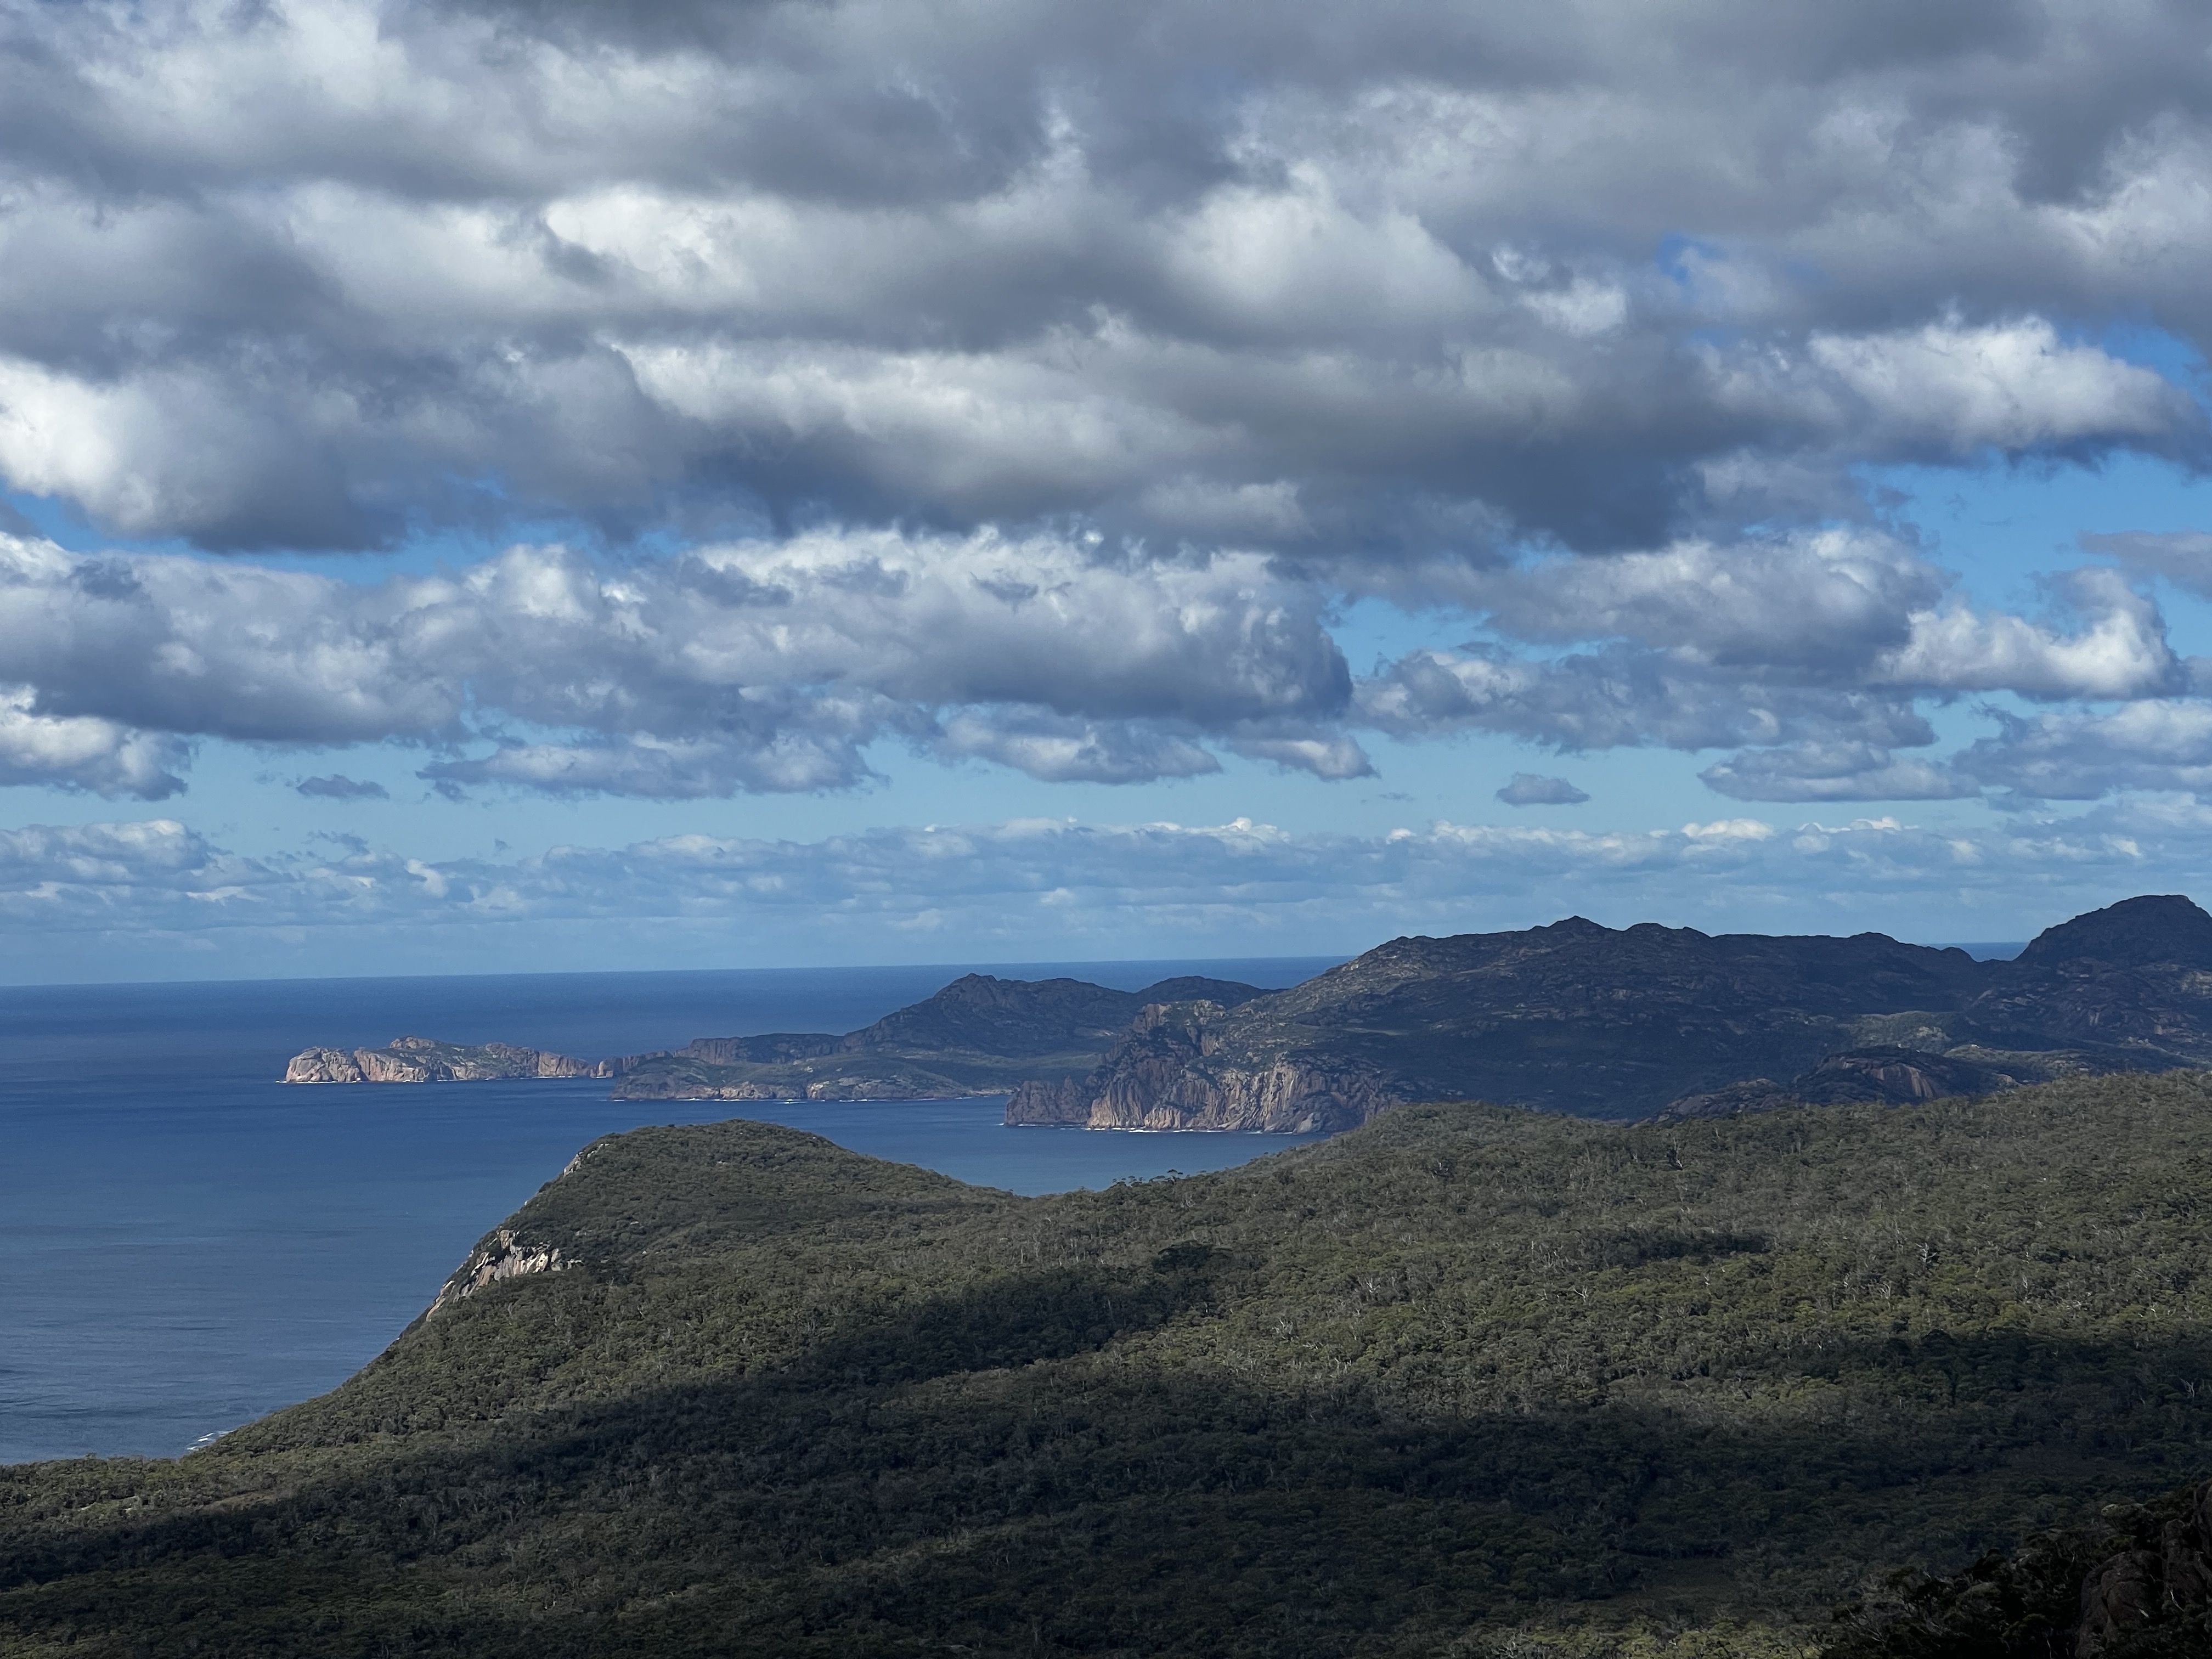
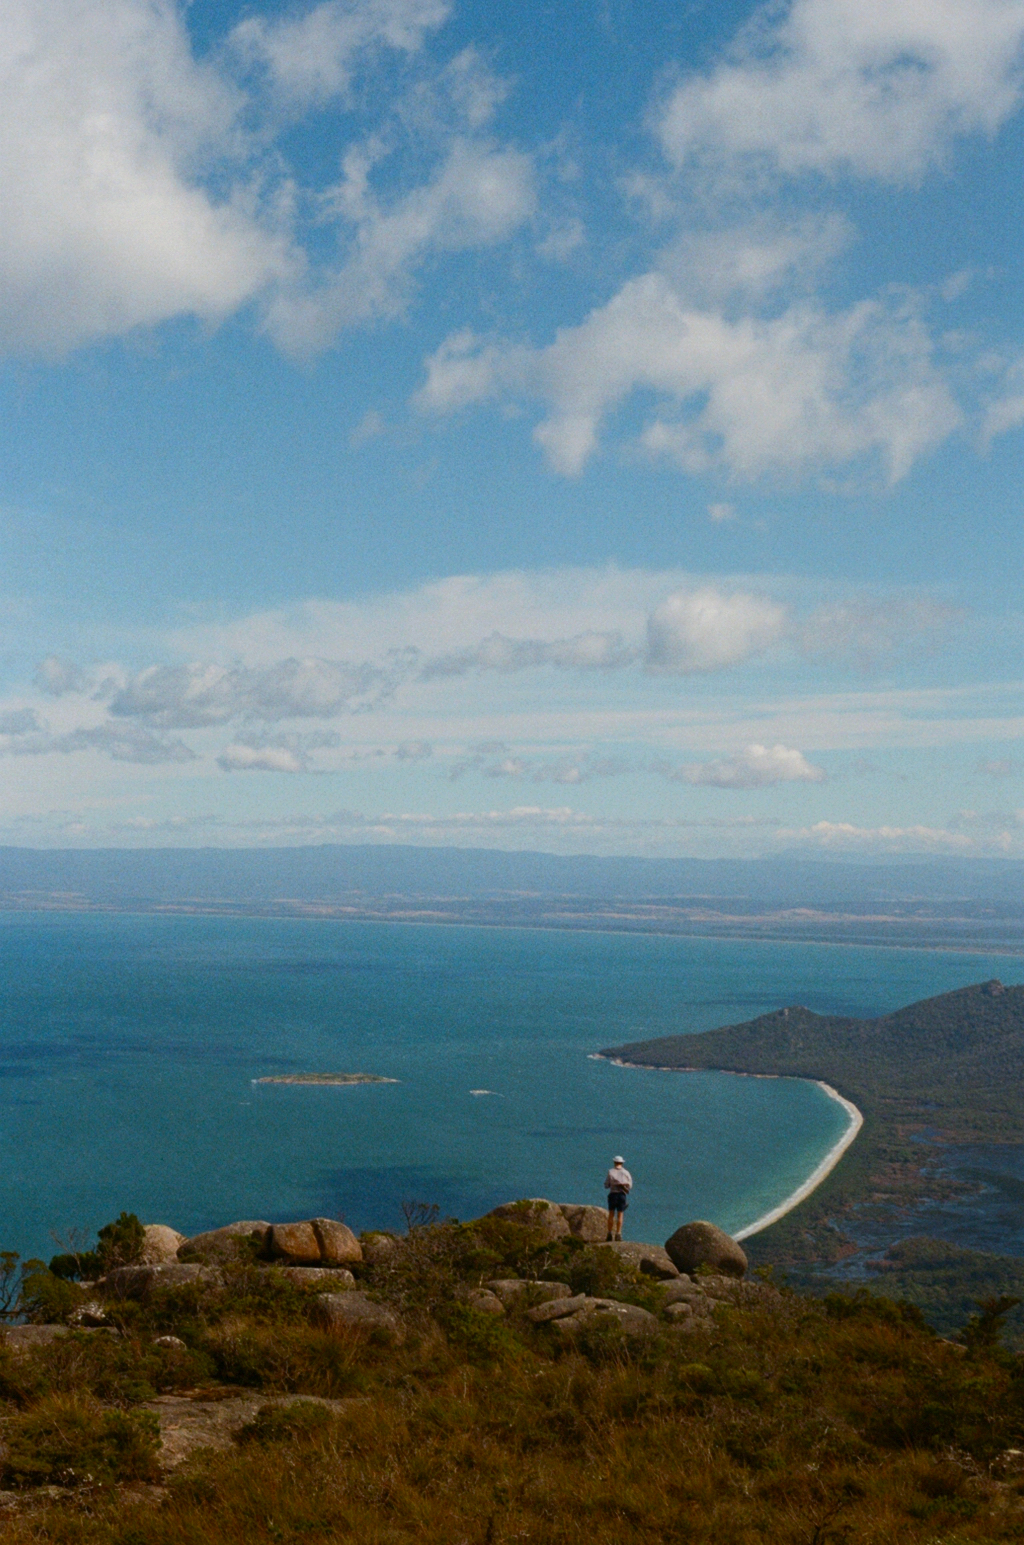
After a bit more time, we got to the top.
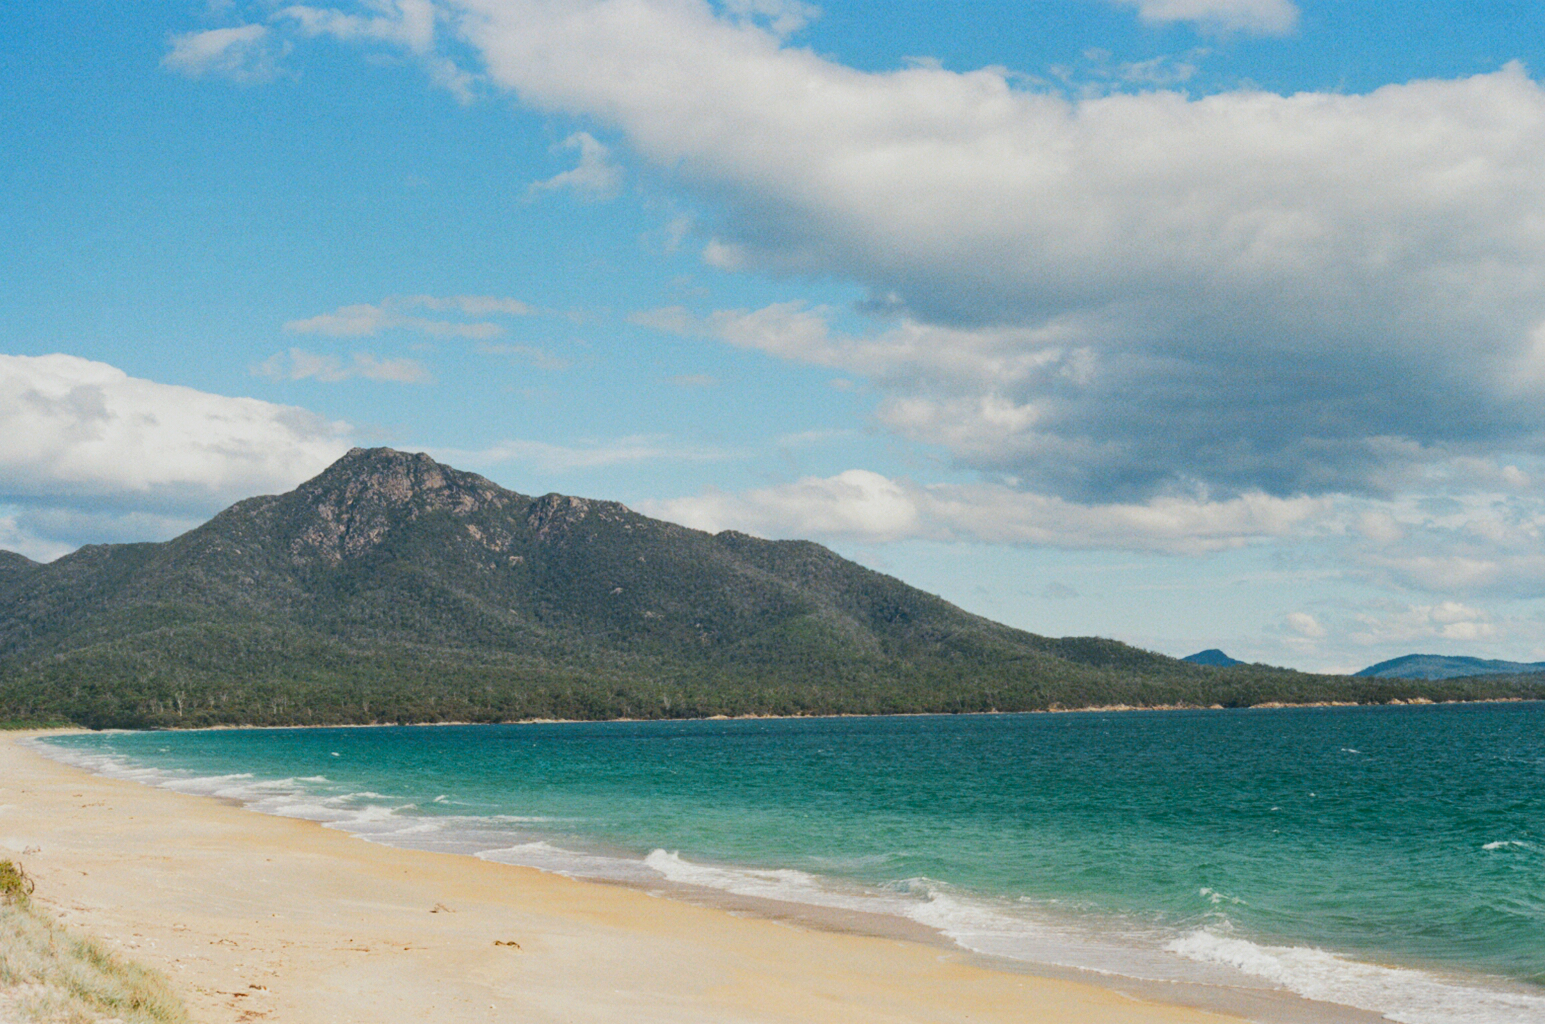
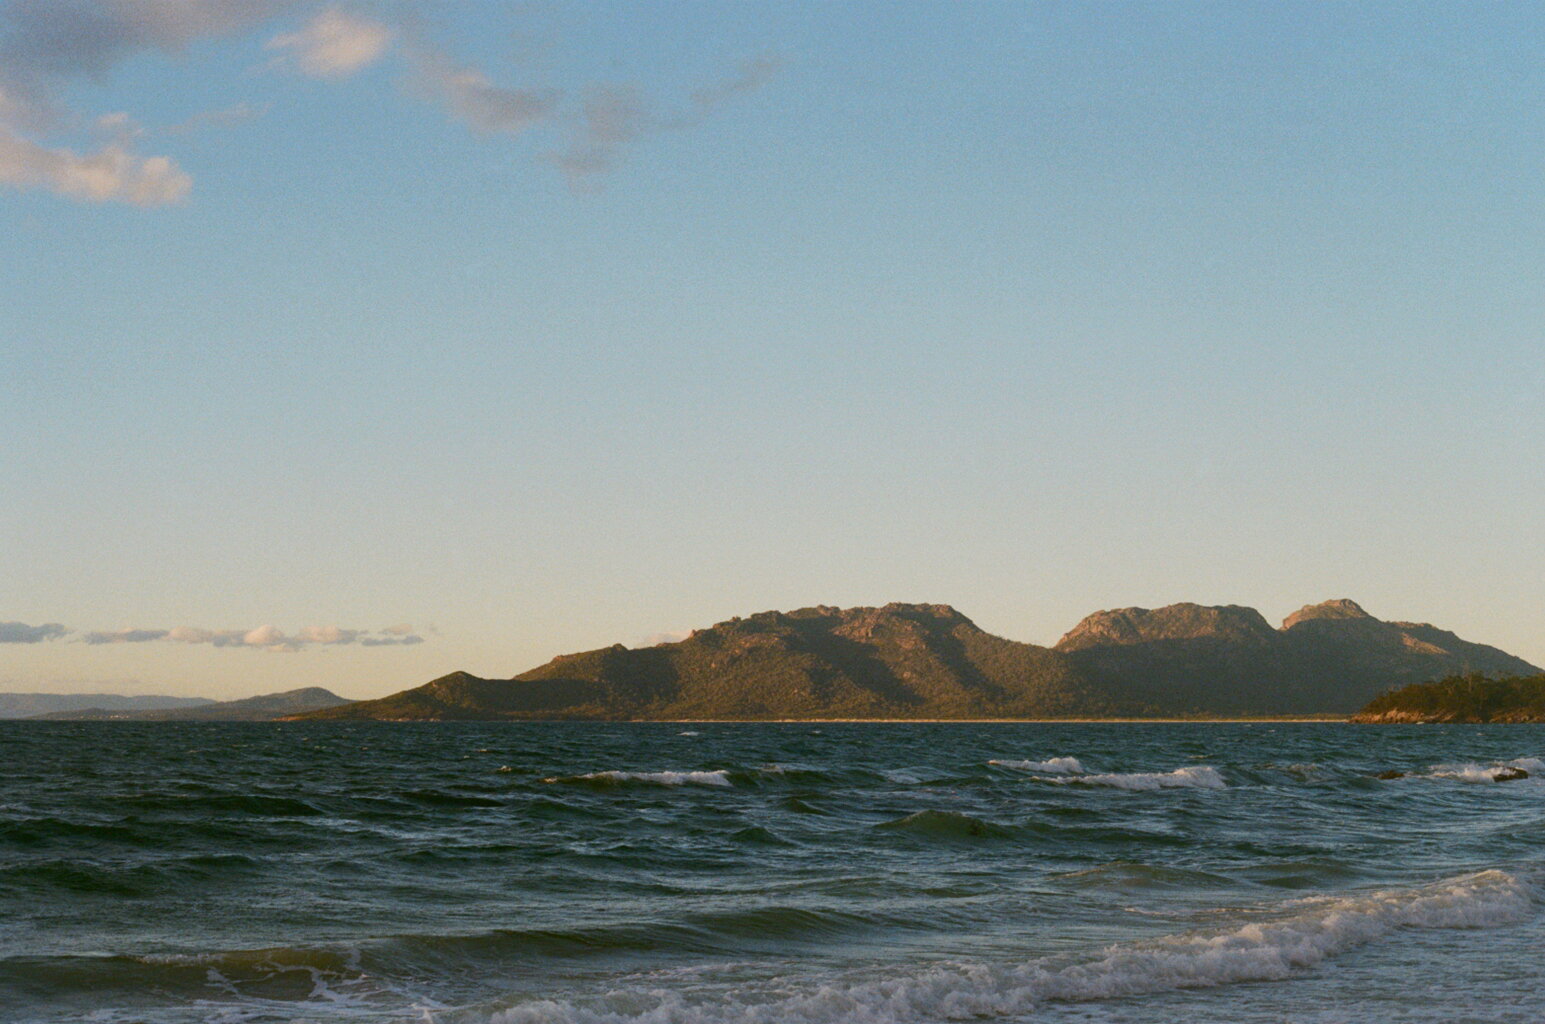
The view down to Wineglass and Hazards Beach were amazing
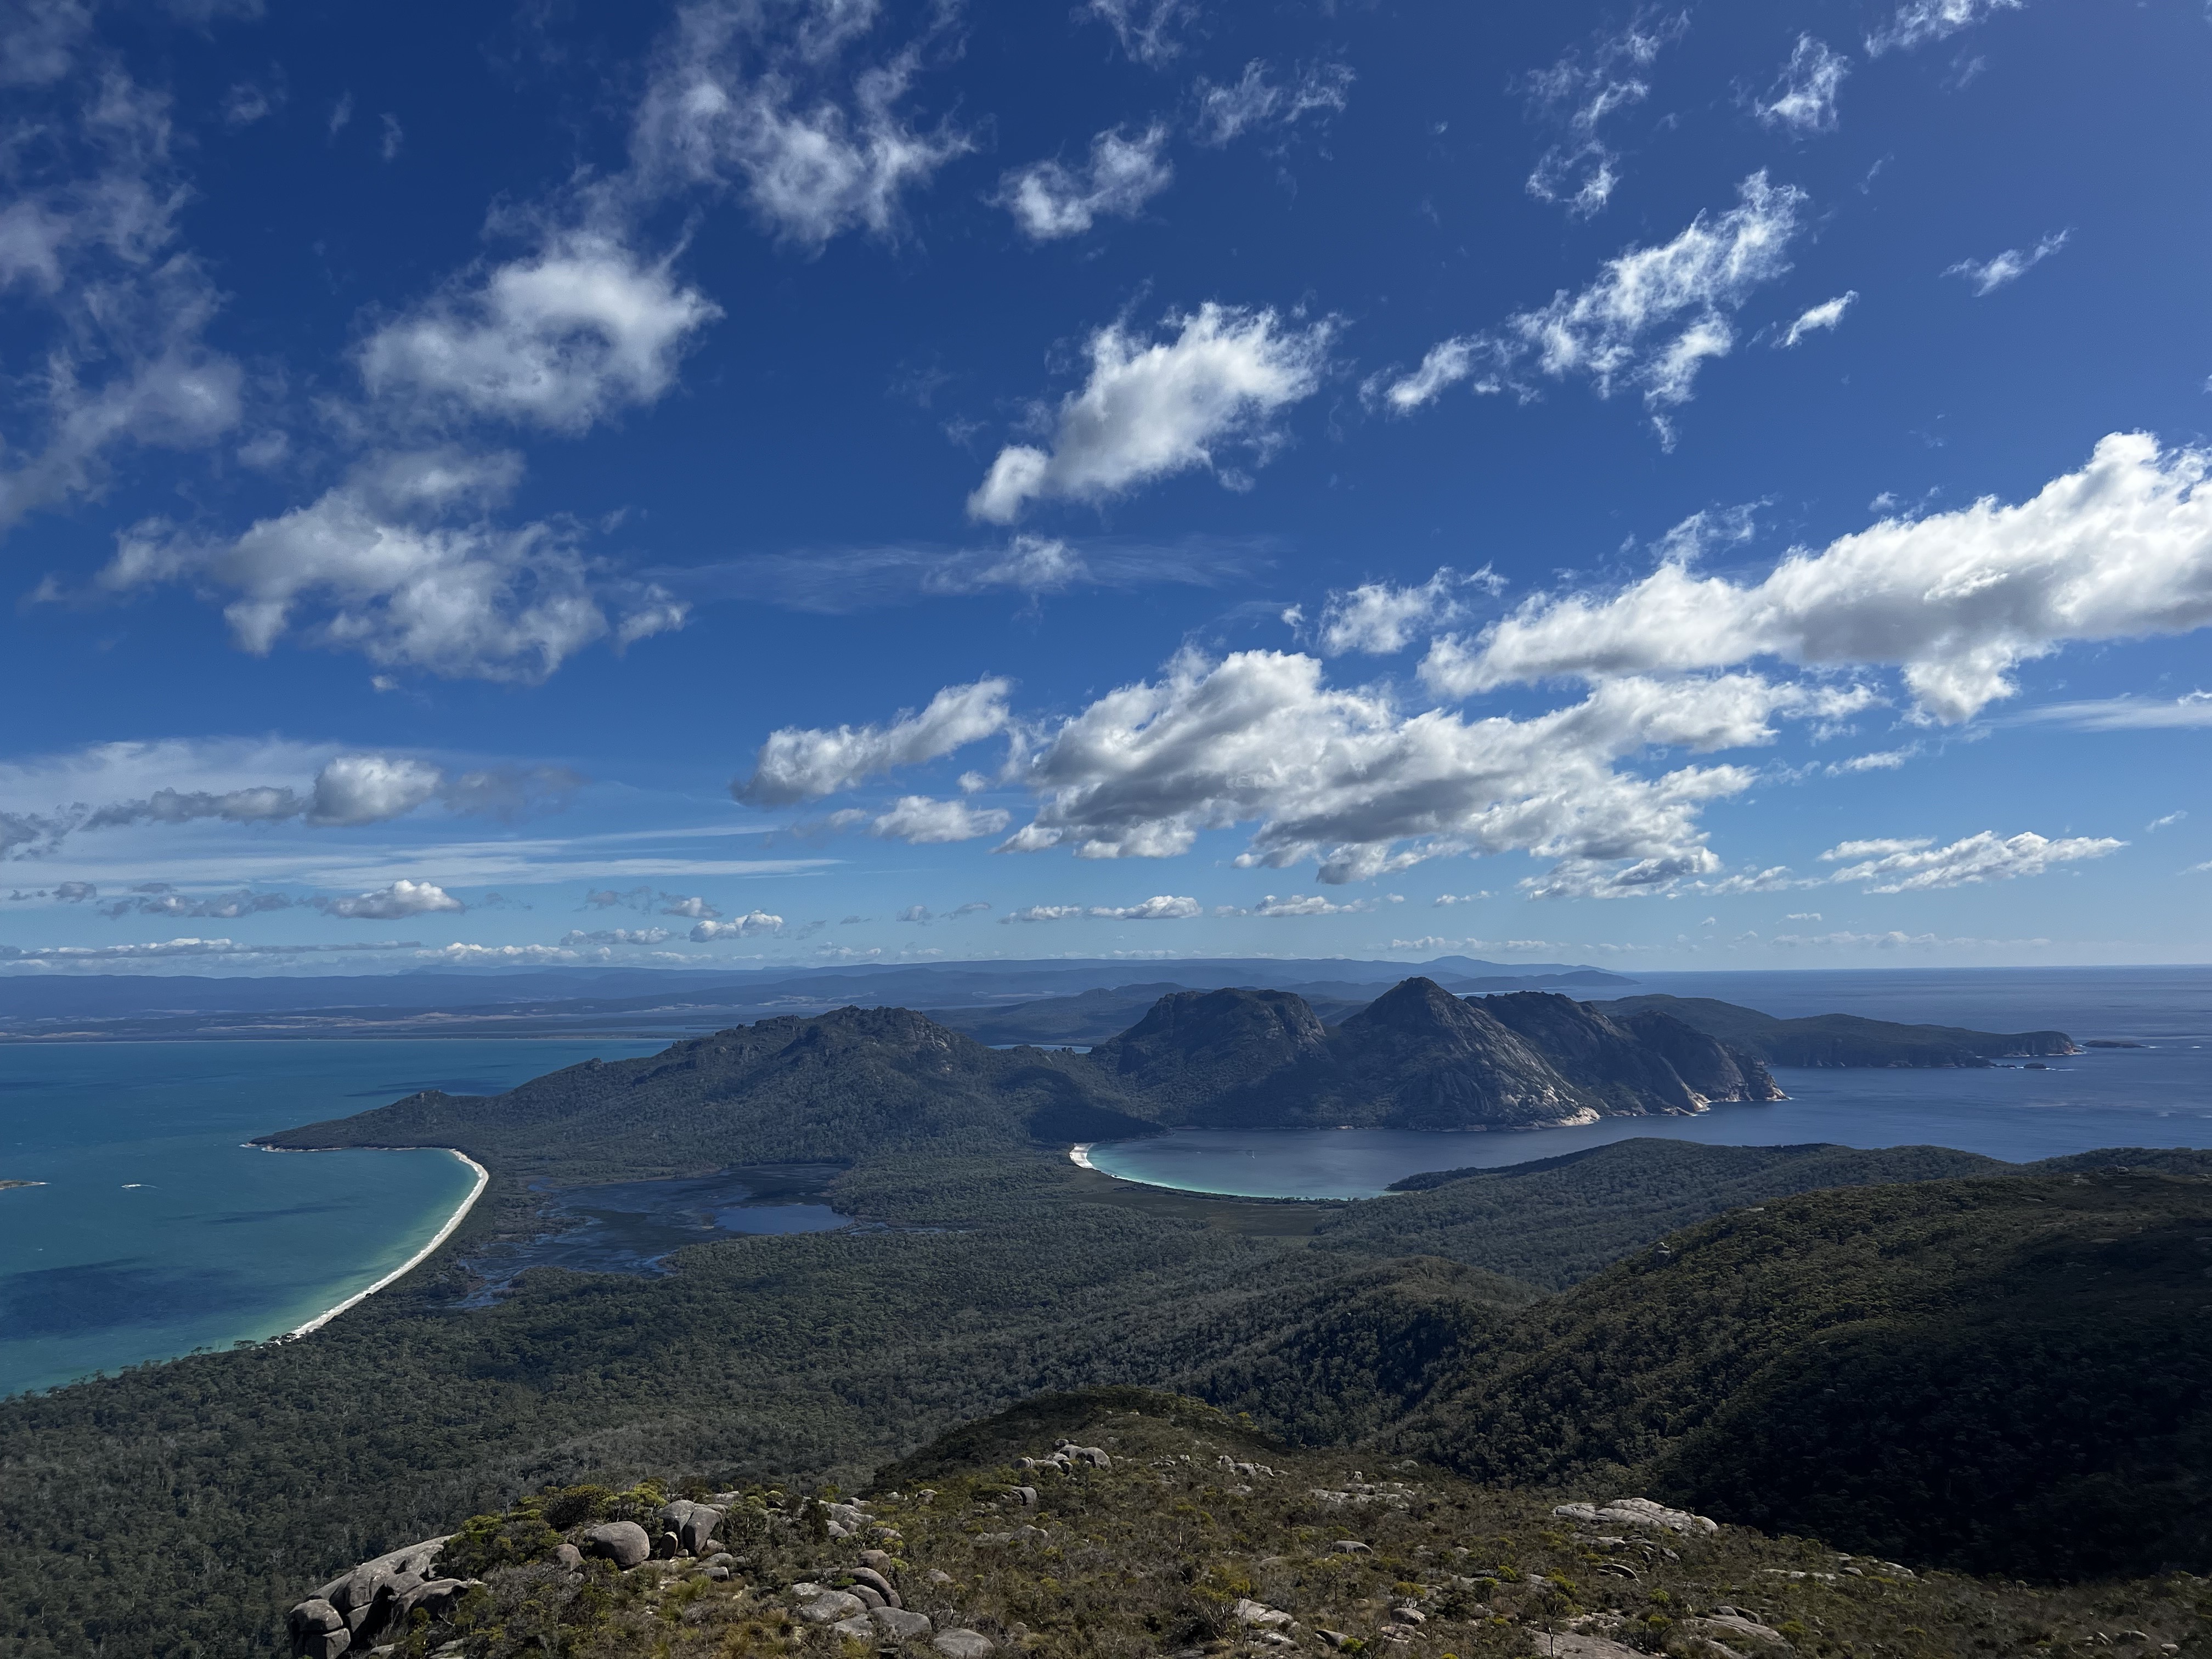
And the view of the Hazards themselves was also lovely.
Here’s a bunch of photos of all the same thing, but taken with different cameras and methods of capturing light (digital and film)

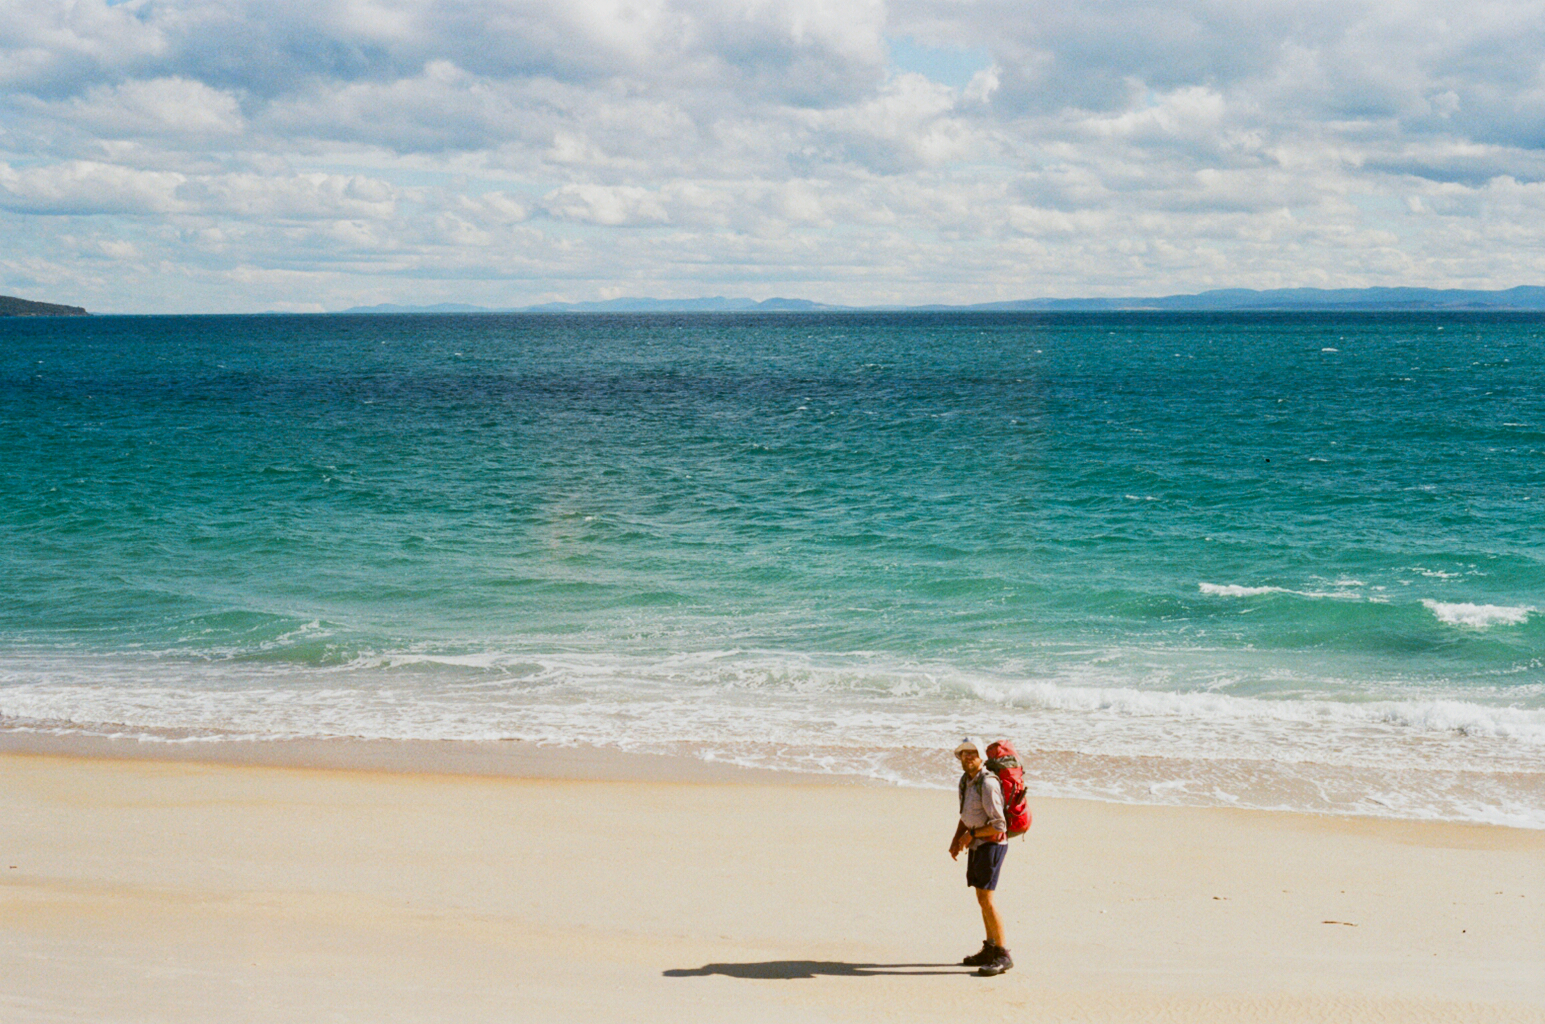
And here’s a picture of me. Don’t normally get many of these cause I’m by myself, so just chucking it in for the fun
After faffing about on the summit for a bit, we eventually walked down to Wineglass Bay.
We stopped for lunch at the southern end of the beach before walking back to the northern end where Hugo had a swim.
From there, it was a quick hop skip and a jump back up to the Wineglass Bay viewing platform and back down the hill to the car.
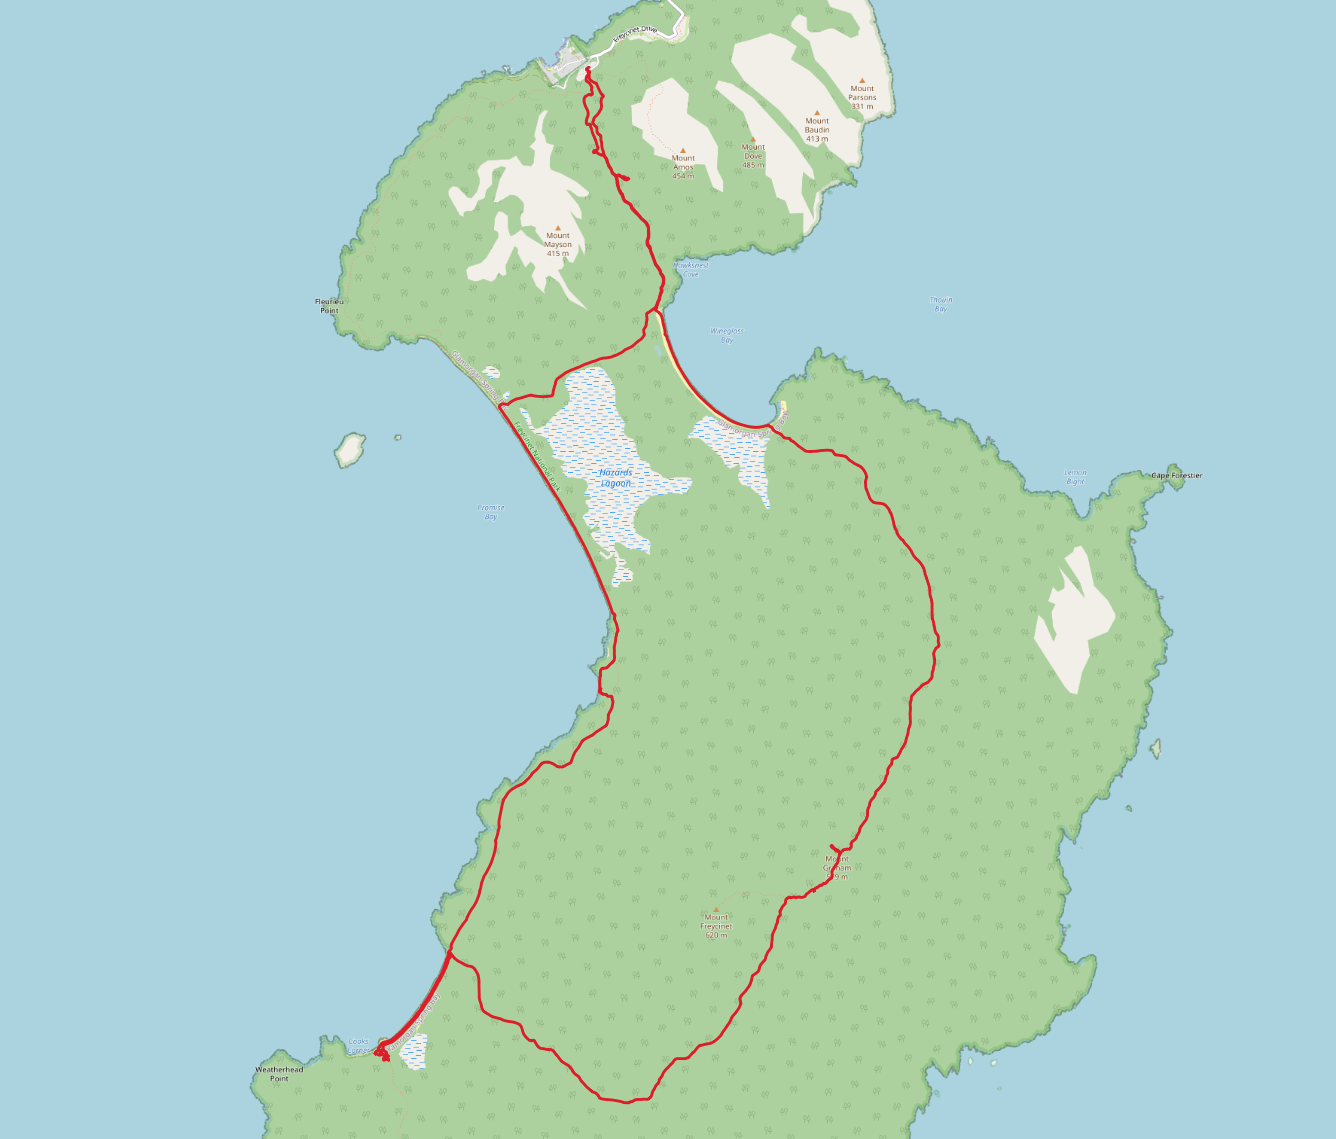
Trip map1
Elevation map